 |
This Article Contains Spoilers -
WARNING: This article contains major spoilers. If you do not wish to know vital information on plot / character elements in a story, you may not wish to read beyond this warning: We hold no responsibility for any negative effects these facts may have on your enjoyment of said media should you continue. That is all. |
 |
DIO has declared that this article has stopped in time, and any or all information on it may be outdated. Help improve this article by checking and updating its info wherever necessary And now time resumes! |
The history of Grand Admiral Thrawn in both the Legends and Canon continuities of the Star Wars franchise.
Legends Continuity[]
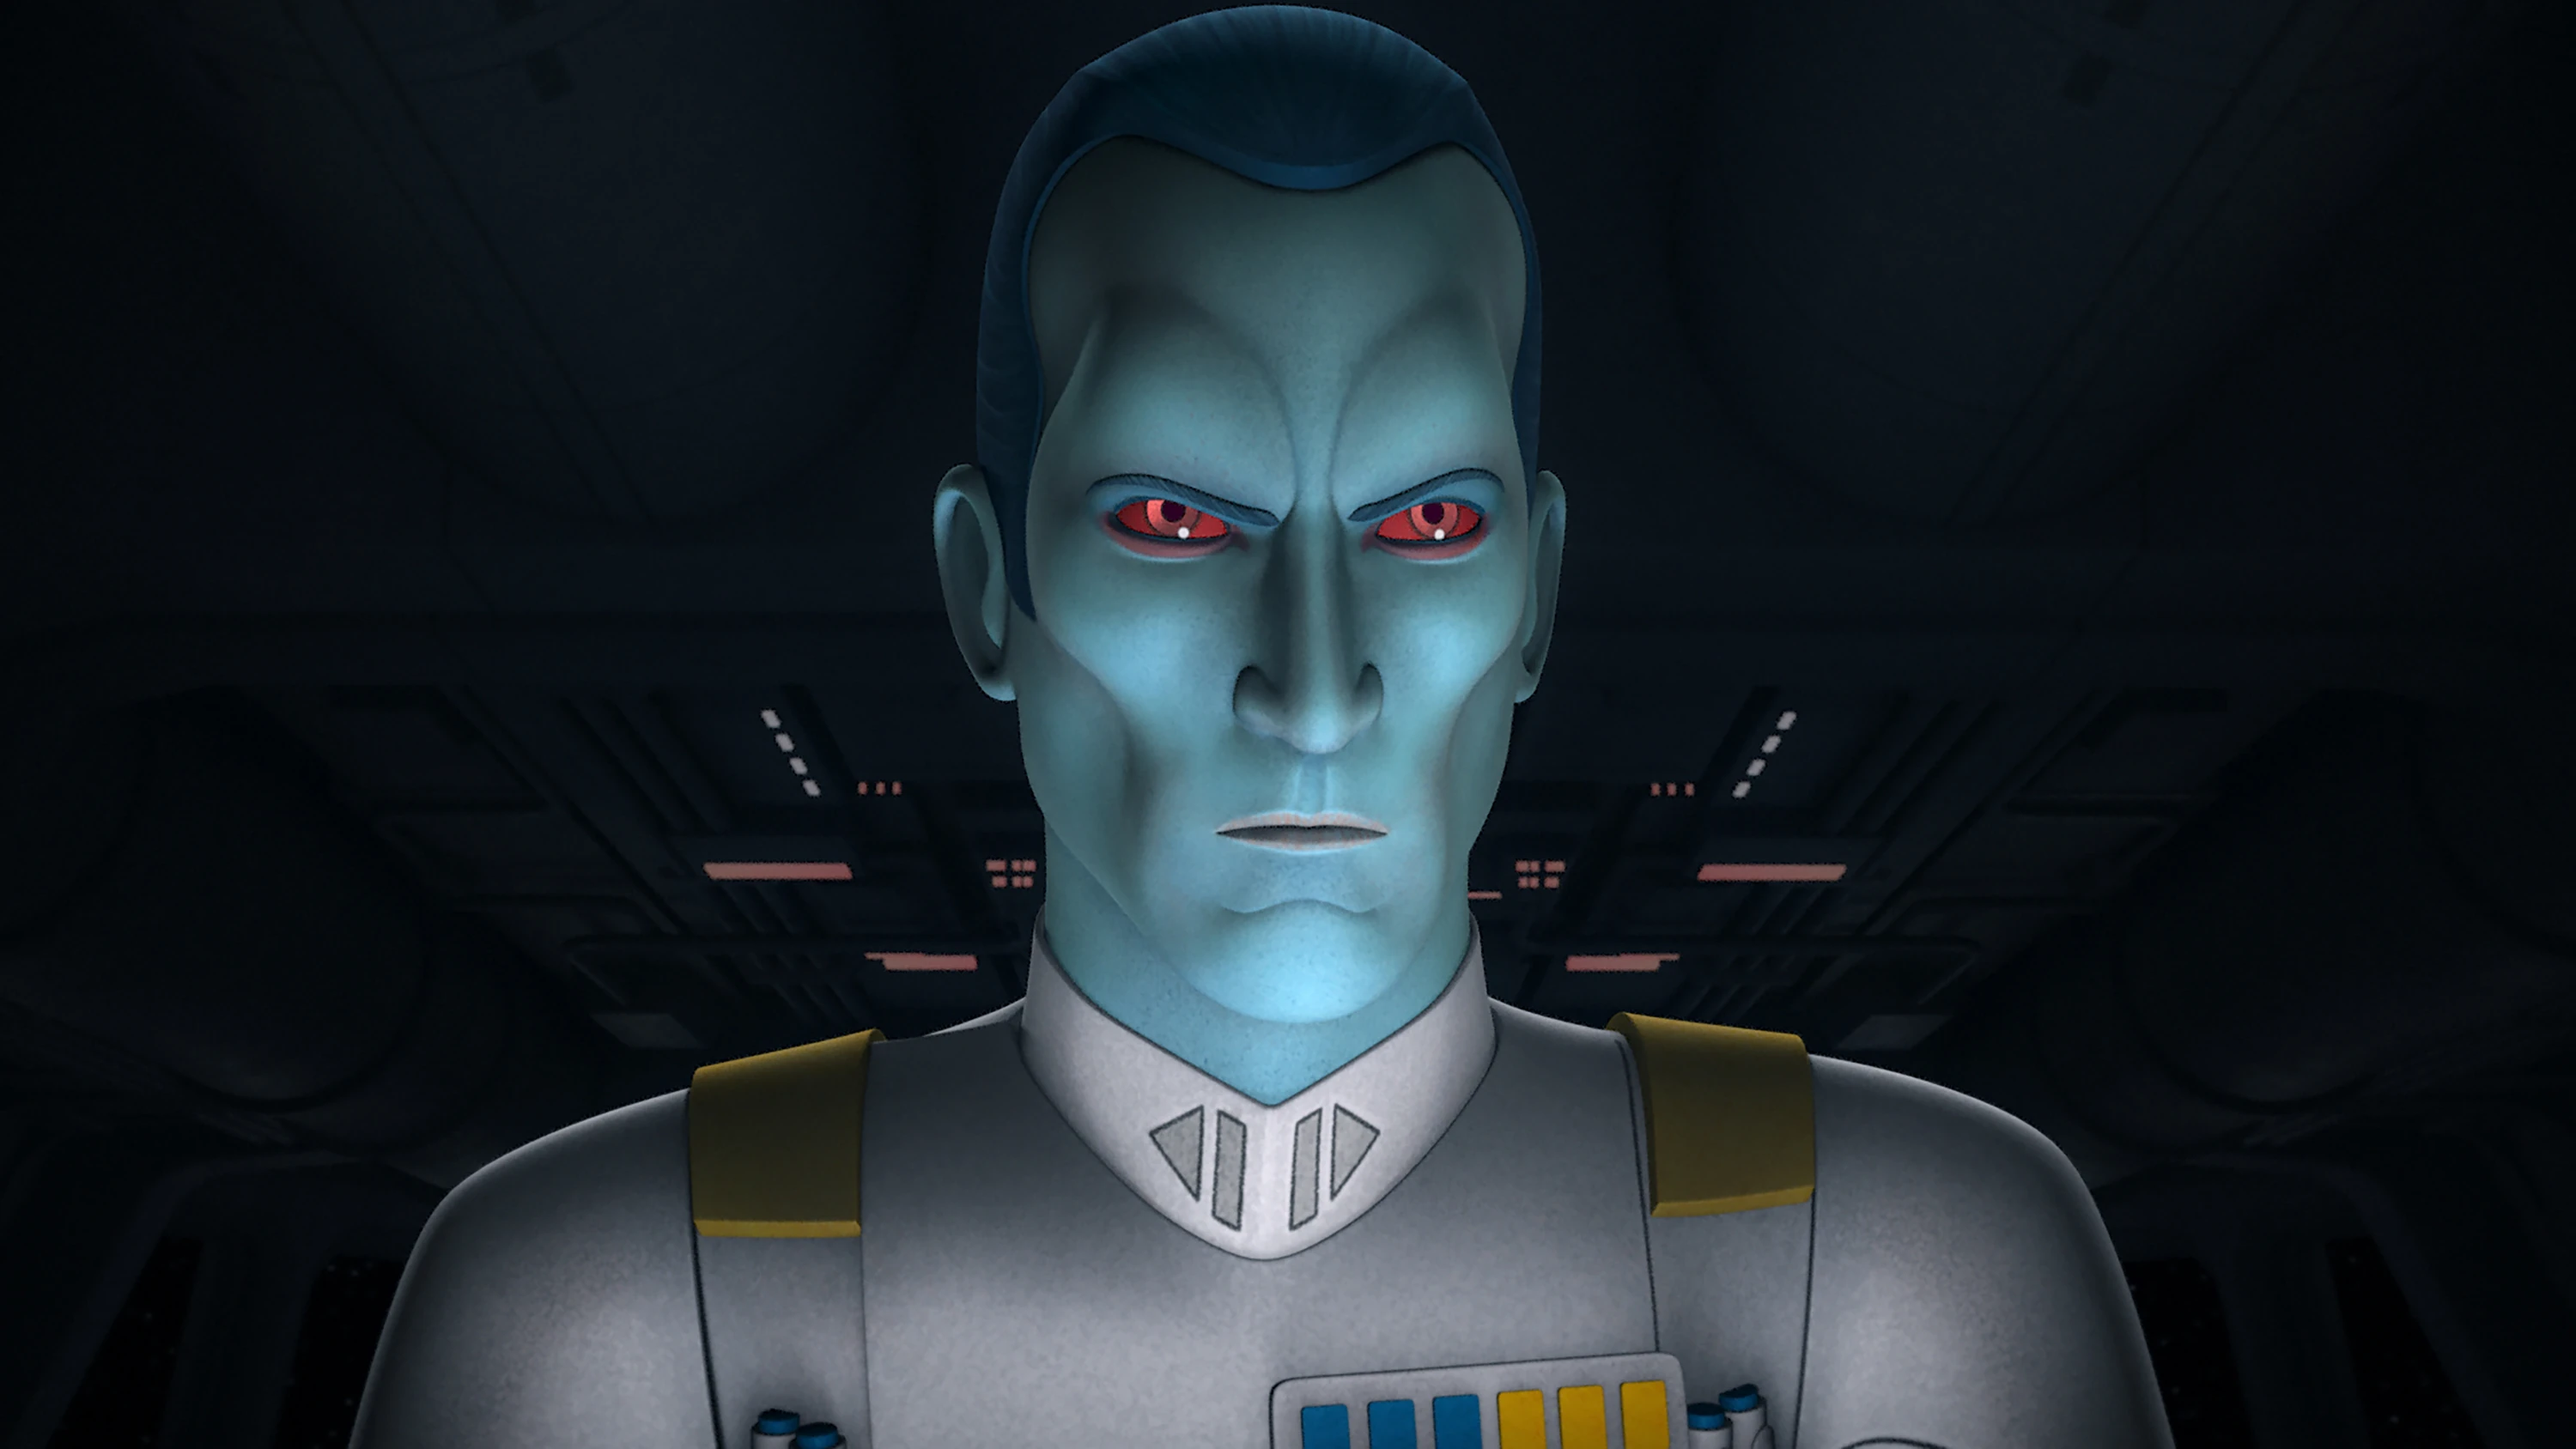
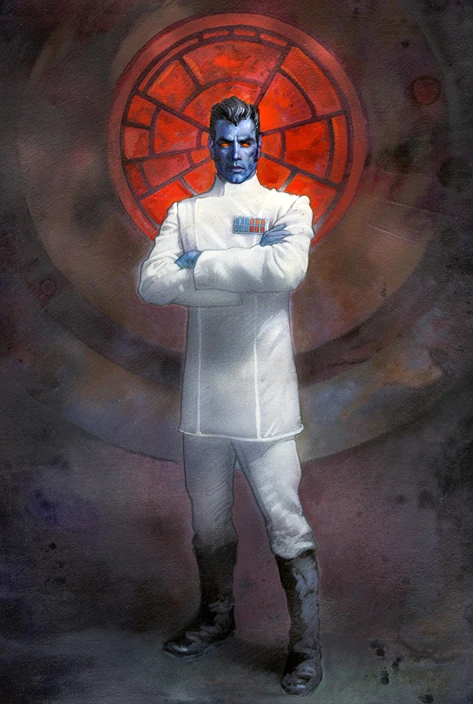
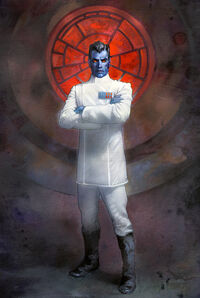
Thrawn in the Legends continuity.
For several years, Thrawn is posted to the Unknown Regions of the known galaxy so the Rebel Alliance and the New Republic that followed it are unaware of his existence (with the possible exception of Mara Jade). The other Grand Admirals are eventually all accounted for - some are captured, others die in battle, and one is convinced to surrender to the New Republic.
Approximately four years after the death of Palpatine, Thrawn returns to known space. Taking command of the remaining Imperial forces from the Star Destroyer Chimaera, Thrawn launches a campaign against the New Republic which nearly brings about the downfall of that state and reestablishment of the Galactic Empire.
Thrawn is ultimately defeated when the Noghri realize that Thrawn and the Empire have been manipulating them into serving them for over a quarter of a century. Thrawn is assassinated by his Noghri bodyguard Rukh. Without a strong leader, the Empire quickly fragments once again until Emperor Palpatine returned in a clone body to assault the New Republic.
Canon Continuity[]
Grand Admiral Thrawn is the commander of the 7th Fleet, Thrawn was promoted to Grand Admiral by Emperor Palpatine after the Imperial victory at the Battle of Batton. In the years prior to the Battle of Yavin, a rebel cell on Lothal Governor Arihnda Pryce requests the services of Thrawn and the 7th Fleet to deal with a rebel cell on Lothal.
Rise to Power[]

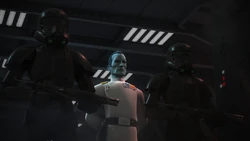
Thrawn captured by Imperials.
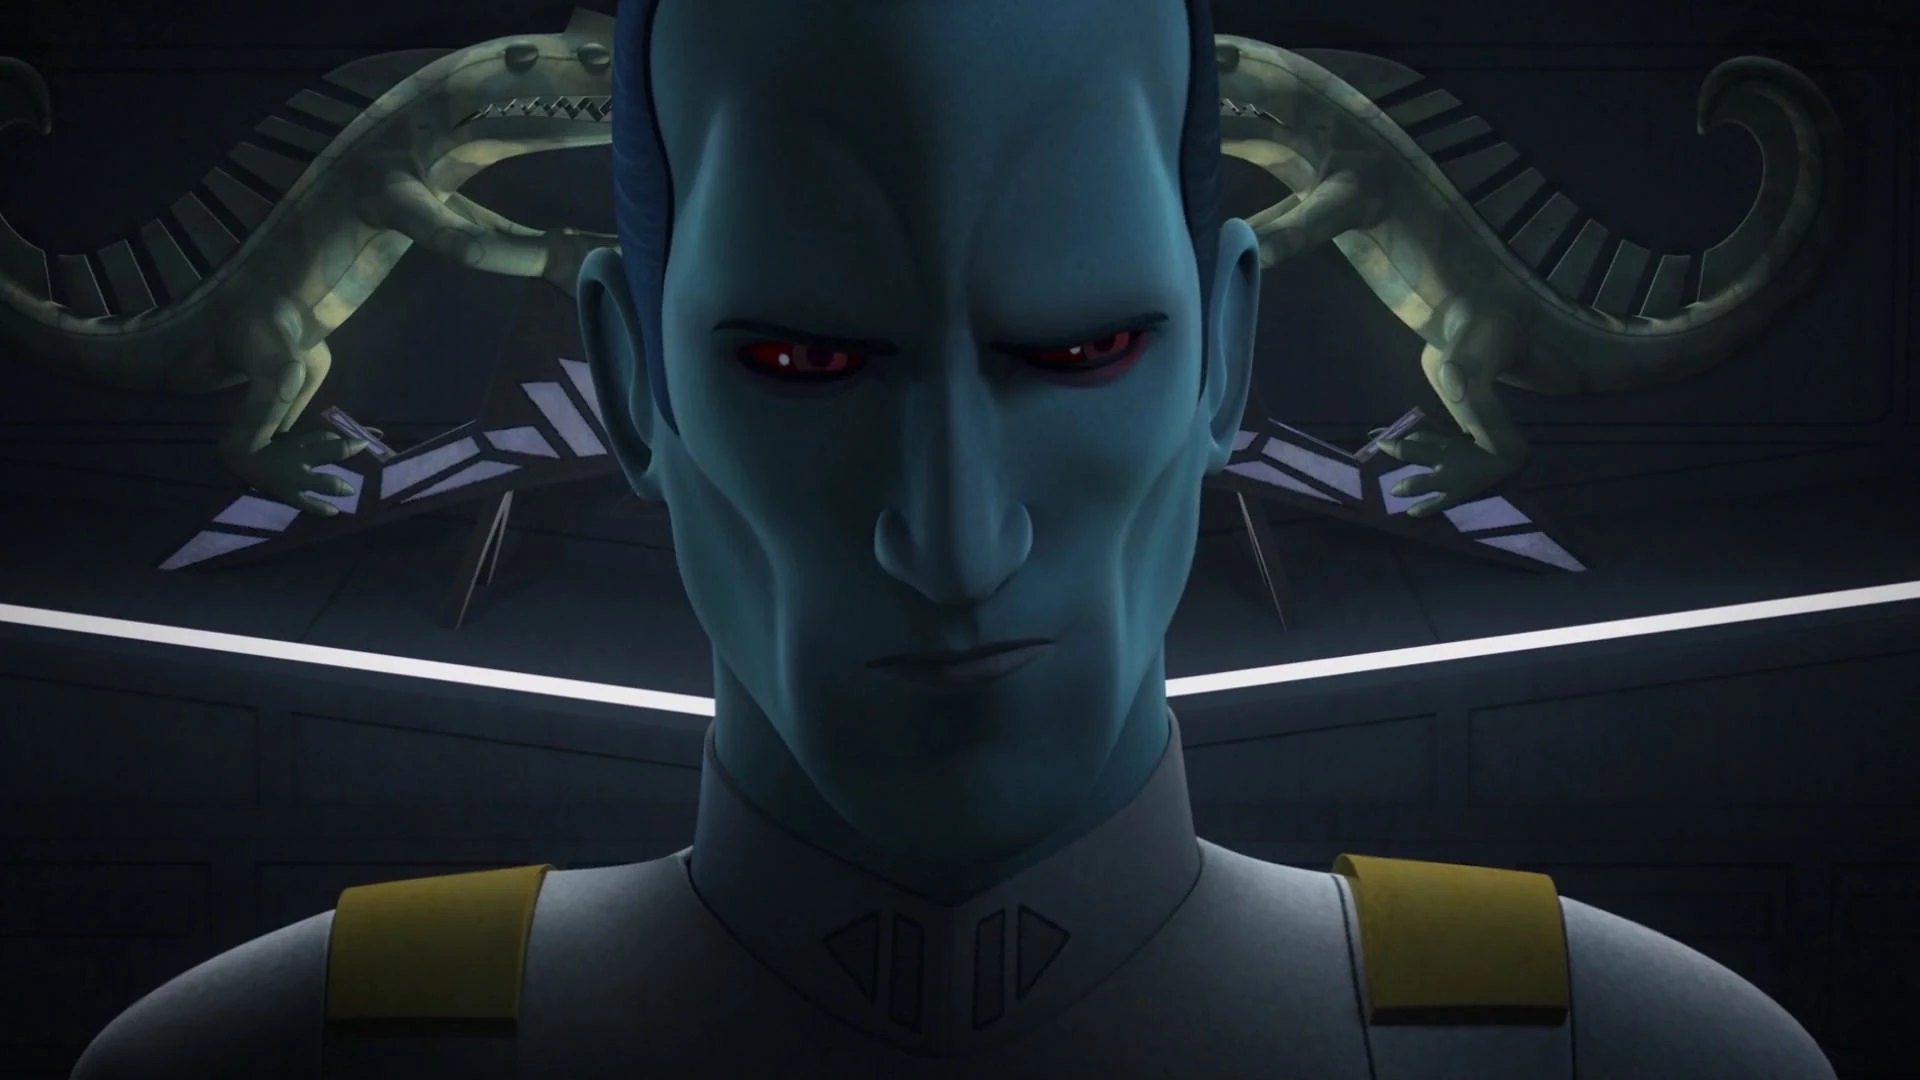
Mitth'raw'nuruodo, better known as Thrawn, is a Chiss male who hails from the Unknown Regions but he is born with the name Kivu'raw'nuru and he is originally a member of the Kivu family, a small and poor family of the Chiss Ascendancy. Additionally, Thrawn has an unnamed older sister, who was taken from Thrawn and his family when he was only three years old. He attended an academy on Rentor, earning the attention of the Mitth family.
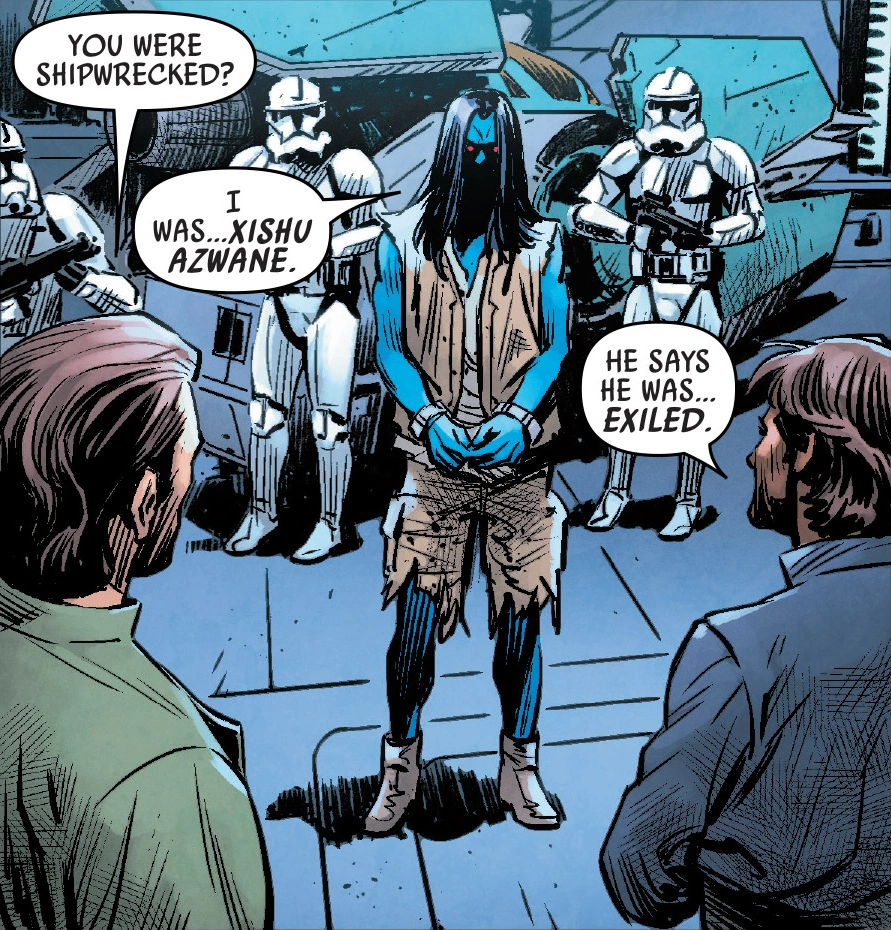
He was accepted into the Mitths as a merit adoptive, and gain his current name through this adoption. During the Clone Wars, he meets Anakin Skywalker, whom he impresses and speaks highly of Thrawn to Palpatine. He pretends to live in exile for several months, in order to study the Galactic Empire before he is "rescued" by soldiers of the Empire. Thrawn's ingenuity and tactical prowess catch the attention of Emperor Palpatine, who is really the Sith Lord Darth Sidious, and believes that the source of his dark power comes from beyond the known galaxy.
He feels a dark presence call to him from the beyond — a presence that not even his apprentice, Darth Vader, can sense. Palpatine takes an interest in Thrawn as a result, keeping the alien in his midst because of what Thrawn knows of traversing the Unknown Regions. Thrawn enters the Imperial Navy as a Lieutenant. He briefly attends the Royal Imperial Academy on Coruscant with his translator Eli Vanto.
Thrawn proves his worth to the Empire, as well as his ambition and military capabilities. He conducts numerous missions to defeat smugglers, spies, and pirates, earning countless victories with his renegade tactics. He receives several promotions as does his aide and translator, Vanto, whom he instructed in combat, leadership, and victory. Politics, on the other hand, is not his strong suit, and he works with Arihnda Pryce, Governor of the Lothal Sector. Much of his knowledge and ambition are put to the test once he ascends to the rank of Admiral.
Thrawn later ascends to the rank of Grand Admiral by defeating a group of insurgents in the Batonn Sector. Though Pryce is to blame, Thrawn takes the credit and receives the promotion from the Emperor himself and meets Vader, unaware he is Anakin Skywalker. The Battle of Batonn results in the elimination of rebel activity in the sector, including the death of Nevil Cygni, but also the death of many civilians, the number of which surpass the number of rebel casualties—an acceptable margin in the eyes of the Empire. He later takes command of the Imperial Navy's Seventh Fleet.
Fighting the Rebellion[]
Arihnda Pryce requests to Grand Moff Tarkin, that Thrawn and the Seventh Fleet be assigned to assist with the rebel threat. Although Darth Vader has dealt with one of the rebels' Jedi leaders, Ahsoka Tano, Pryce believes it is time to have the assistance of someone who can see the bigger picture — the threat of rebel cells coming together to form an organized resistance movement, to which Tarkin agreed.

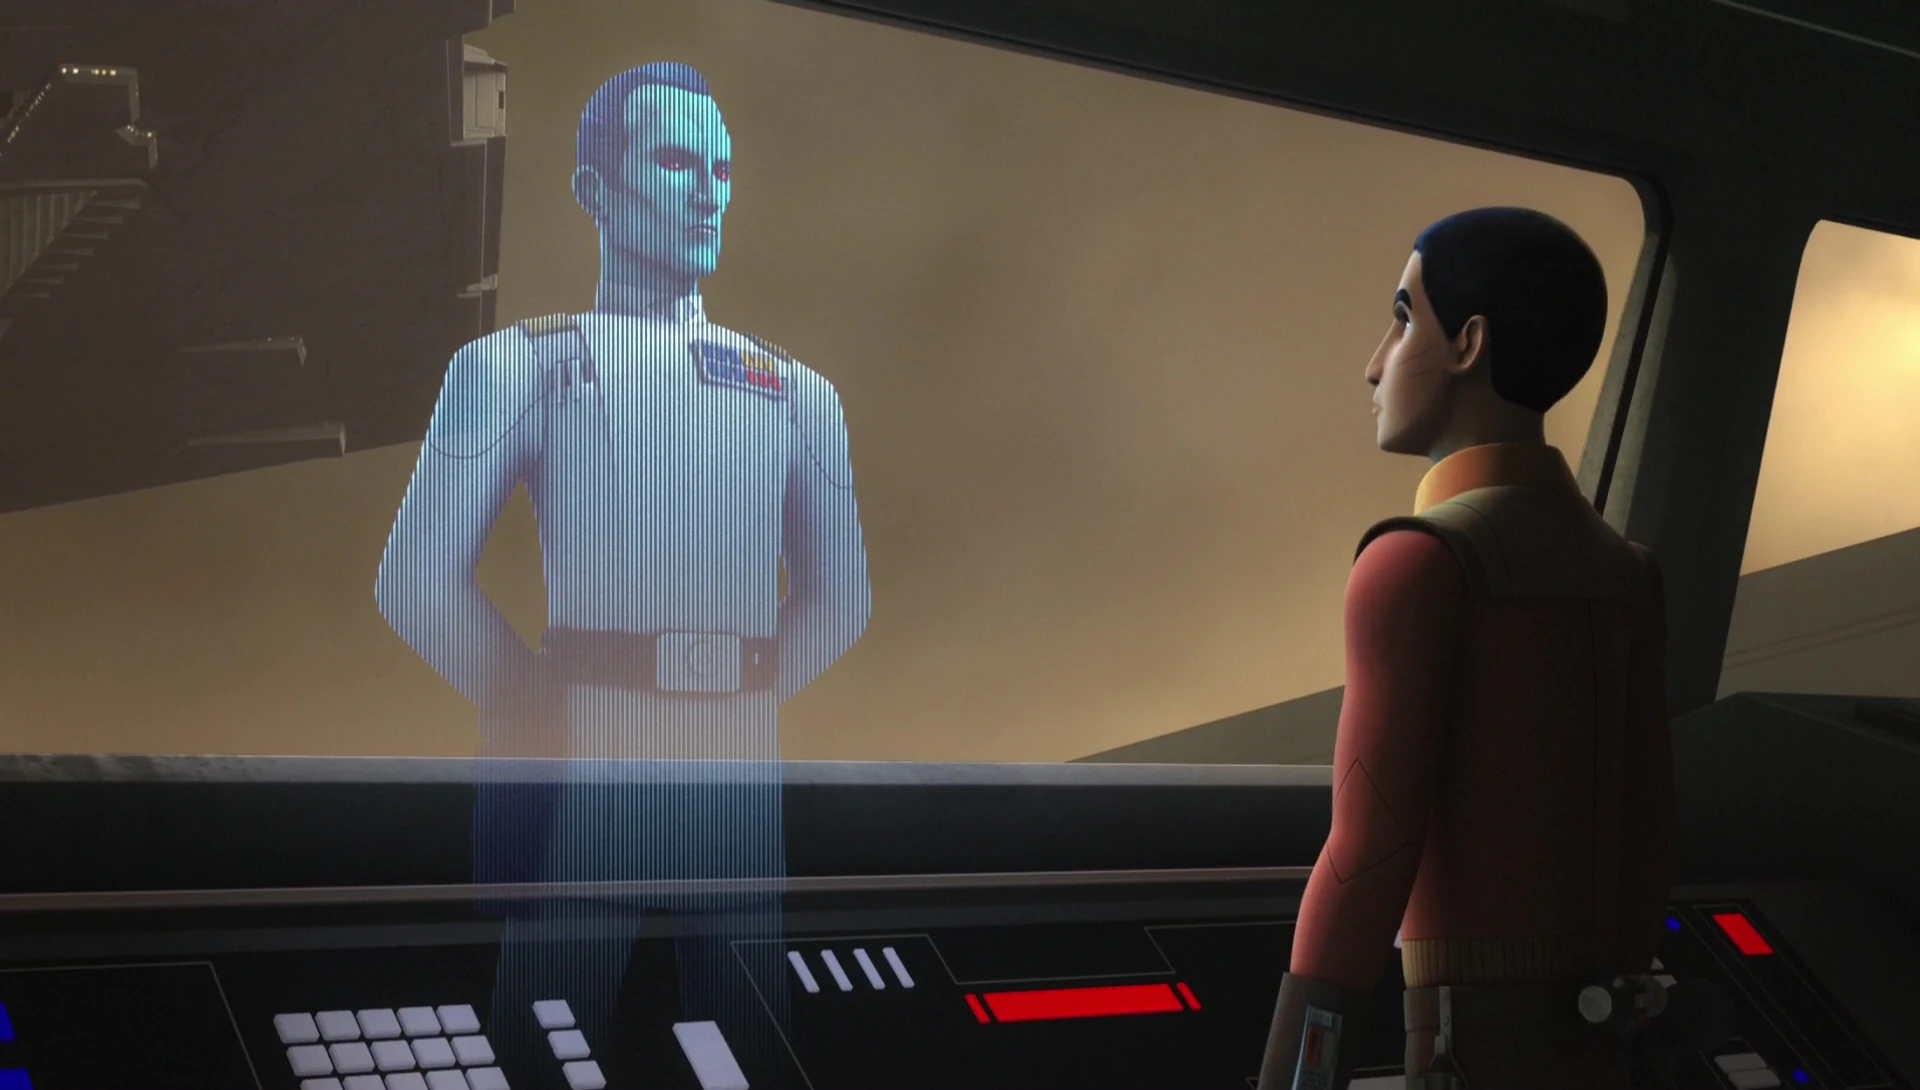
Thrawn discussing his plan to destroy the Rebellion.
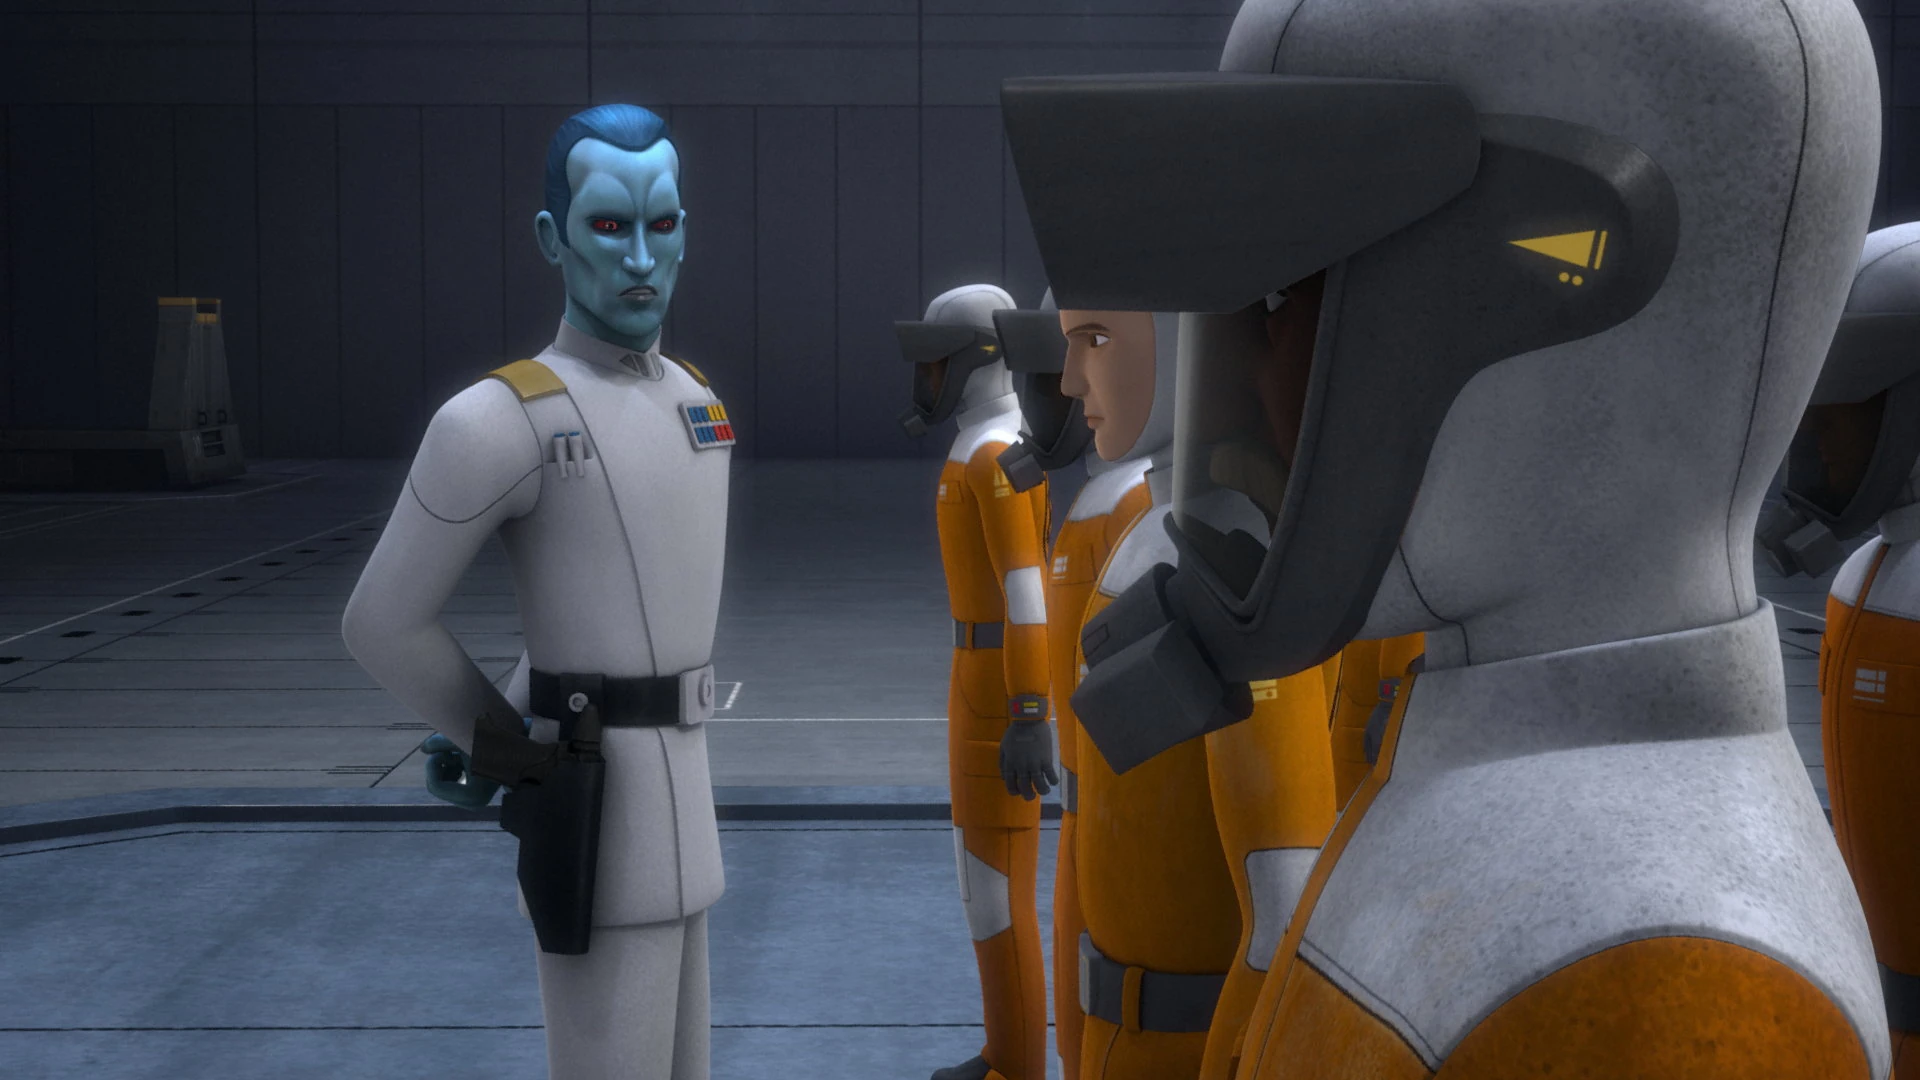
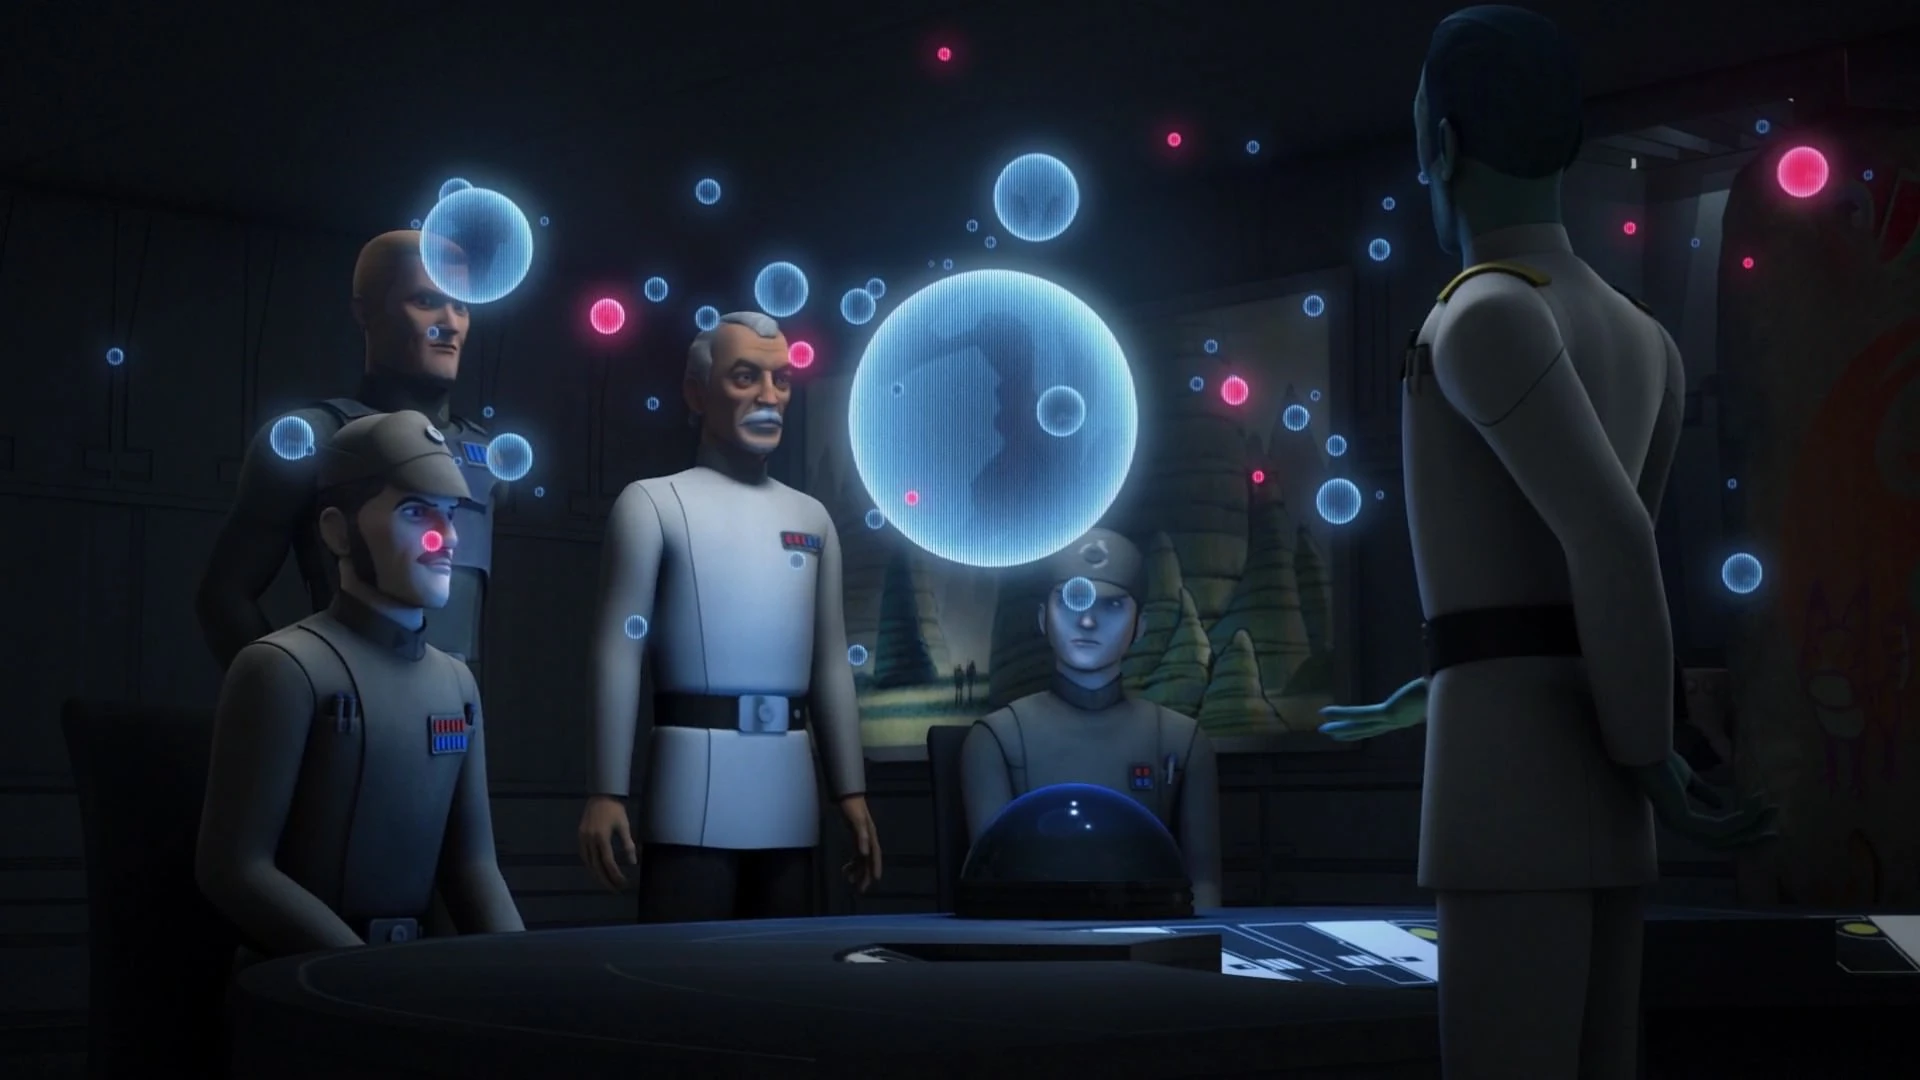
The Grand Admiral soon arrives and begins overseeing operations against the rebels; attending a briefing with Tarkin, Pryce, Agent Kallus, and Admiral Kassius Konstantine where they discuss that the rebels have attacked a Mining Guild convoy at the Sereeda Waypoint, which Thrawn deduces as meaning that the rebels are planning an operation on Reklam Station in the Yarma System.
The Grand Admiral declares that he will pull the rebels apart piece by piece, ensuring that they will be the architects of their own destruction. The Imperial garrison there is alerted to the potential rebel threat. During the Rebels' operations, they steal a number of Galactic Republic Y-Wing Starfighters that are left over from the Clone Wars. A convoy of rebel ships arrive to assist, and Thrawn allows them to escape. While some officers, such as Konstantine, believe that these ships are the rebel fleet, both Thrawn and Pryce know that there is a larger resistance movement growing in the galaxy and that these rebels could be the key to the Empire destroying them all.
Occupation of Ryloth[]
Later, Thrawn fought against the Free Ryloth Movement led by Cham Syndulla who had found previous success fighting against the Imperial occupation of Ryloth under Captain Slavin who underestimates Thrawn's abilities and battle strategies. When combating the Twi'leks, Thrawn uses far more precise tactics compared to other Imperial officers Cham had encountered. Thrawn establishes a base of operations on Ryloth in the Tann Province, where he spends time commanding Slavin's forces against the Twi'lek resistance fighters as well as studying their culture to better understand them.


Thrawn meeting Hera Syndulla for the first time.
Thrawn then speaks with Slavin in his headquarters inside Syndulla's House about his security arrangements. However, Thrawn knows that Cham will come for his family's Kalikori. Thrawn and Slavin then run into a servant who tries to steal the Kalikori so Thrawn, Slavin, and several troopers then take her into questioning. There, Thrawn is able to deduce from the Syndulla family portrait that she is Hera Syndulla and is also able to see that the Scout Trooper is actually Ezra Bridger and stuns him.
After instructing Slavin to deal with the prisoners, Thrawn reveals his intent to have the Kalikori taken to his ship and is briefly enraged with Slavin when the lower officer suggests that it be destroyed. Thrawn then goes aboard an Imperial Light Cruiser and watches as Slavin does a prisoner exchange between Cham and his daughter. Cham and the Rebels are able to escape from Slavin's forces but Thrawn allows the rebels to have their victory, making no effort to prevent their escape.
Testing Konstantine[]

Thrawn, Admiral Konstantine and another officer discuss the events on Mykapo.
Thrawn is aboard the Chimaera above Lothal with the Seventh Fleet when Admiral Konstantine and another Imperial officer arrive to report on the imposition of martial law on Mykapo and the ongoing Imperial blockade of Synistahg. After learning that a local rebel cell called the Iron Squadron habe attacked an Imperial patrol with the help of the Ghost, Thrawn deduces that the rebels are evacuating Mykapo's "treasonous" inhabitants. Curious about the Iron Squadron, Thrawn dispatches Admiral Konstantine to deal with the rebels there.
When Konstantine announces that he will depart with a full squadron, Thrawn insists that the Admiral only deploy a single light cruiser. He reasons that one ship will be sufficient for a man of his talents and the Admiral is unhappy but complies after Thrawn insinuates that he is not up to the challenge. Konstantine manages to damage the Iron Squadron's leader Mart Mattin and his ship Sato's Hammer and attempts to use him to lure his rebel rescuers into a trap. However, the Ghost Crew circumvent Konstantine's plan and manage to rescue Mart with the help of his uncle Commander Jun Sato. In desperation, Konstantine sends a call for reinforcements to Thrawn.

Thrawn talking to Kassius Konstantine after the latter's defeat.
Thrawn arrives in his Star Destroyer shortly after the rebels damage Konstantine's light cruiser. The rebels narrowly collide with his ship but manage to flee under the ventral hangar. Speaking to Sato over the com, Thrawn vows to meet him again and the Grand Admiral replies in a similar fashion and allowed the rebels to escape. Thrawn then turns his attention to Konstantine and asks whether he had contacted him for assistance. Konstantine tries to deny it by claiming he had called to report that he had driven the rebels from the system. However, Thrawn realizes that Konstantine is lying after seeing his blazing cruiser and notes that the planet's "treasonous" inhabitants had already escaped.
Hunting down Subversives[]
After a surge of defective vehicles at the Lothal Imperial Factory, the Imperial High Command dispatched Thrawn to investigate the presence of subversives at the factory. In fact, a small rebel cell led by the former Governor Ryder Azadi has been infiltrating the factory and sabotaging vehicles. Thrawn also initiates a new starfighter initiative to develop a TIE equipped with deflector shields as he believes that this TIE will contribute to the Empire's counter-insurgency efforts against the Rebellion.

Thrawn addressing the Lothal factory workers.
The disillusioned Kallus leaks intelligence of the starfighter project to the Rebellion where, while Kallus does not know the full details of the project, his information leads Phoenix Squadron to send Ezra, Kanan Jarrus and C1-10P to spy on the factory and link up with Ryder's cell. The rebel mission coincides with Thrawn's crackdown on the factory where, after berating the workers for their poor craftsmanship, Thrawn forces Morad Sumar to demonstrate how fast a 614-AvA Speeder Bike can reach maximum speed since he had earlier inspected the vehicle.
The speeder bike begins to overheat and Sumar begs Thrawn to end the simulation but Thrawn is not satisfied and sets the speeder bike's engines to full speed. The faulty bike explodes and kills Sumar with Thrawn's actions horrifying Ezra, Kanan, the workers, and even Kallus. Thrawn took this as an opportunity to warn the workers that they will be personally testing every vehicle they built. Thrawn then orders Pryce, Kallus, and Lieutenant Yogar Lyste to question each of the workers whilst, as a precaution, the Empire also jam the factory's communication signals.
However, Ezra and his team manage to slip away and reach Section A2, which stores the blueprints for Thrawn's weapon. Meanwhile, Thrawn reassures Pryce that he has secured the chamber by ordering the sentries to shoot anyone trying to enter the facility without his personal code on sight. When Kallus expresses skepticism that Thrawn's new fighter initiative will make a difference, Thrawn responds that victory and defeat depend on the smallest details. He then orders another worker to demonstrate his All Terrain Defence Pod. When the walker collapses, Thrawn gestures for the Stormtroopers to arrest the man.
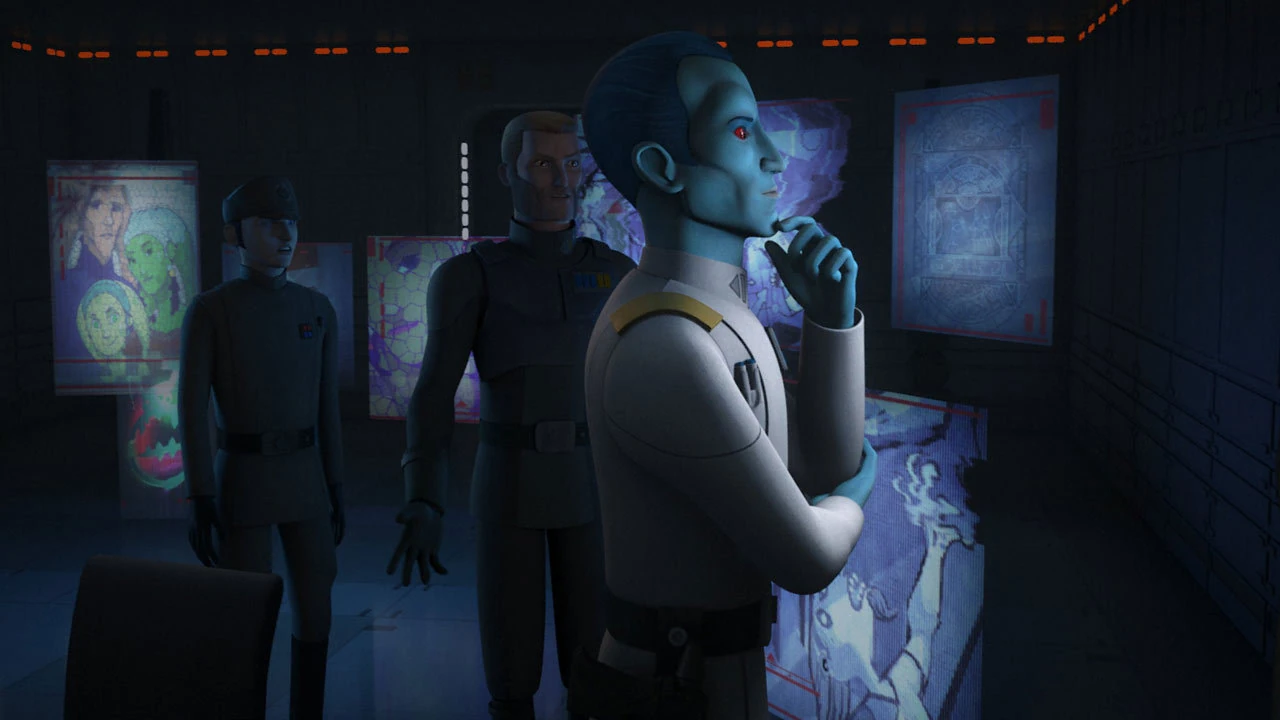

Thrawn studying his enemies' art.
Thrawn later summons Lyste and Kallus to his office which is decorated with holographic displays of the Ghost Crew. Thrawn then shows his subordinates one of Sabine's Starbird graffiti paintings. While Lyste merely dismisses the painting as a retaining wall, the more perceptive Kallus recognises the Starbird as a creature of light that had been re-appropriated as a symbol of the Rebellion. Thrawn speculates that the Ghost Crew have a special connection to Lothal and.
When he inquires about their crackdown, an officer informs him that two of the workers have disappeared following his speech and that they left behind their uniforms. Kallus advises issuing an alert but Thrawn counters that the rebel infiltrators have already found new disguises and are after his secret project. Thrawn orders Kallus and Lyste to secure Section A2 but the rebels manage to escape the factory with the help of Kallus. Kallus allows the rebels to escape on an AT-DP walker at the east gate's hangar bay whilst the rebels' escape coincides with a diversionary attack launched by Ryder at the east gate.

Thrawn believes the Rebels have a mole within the Empire.
Reasoning that the rebel infiltrators will take advantage of the attack to make their escape, Thrawn orders the AT-AT Pilots to attack the rebel's stolen AT-DP walker. Despite the efforts of Thrawn, the rebel infiltrators manage to escape with the stolen plans. Later, Thrawn hears a report on the skirmish from Lyste. voices his suspicion to Pryce and Kallus that the Empire has a mole within their ranks who is supplying the Rebellion with information. When Pryce suggests questioning all Imperial personnel, Thrawn advises setting a trap for the traitor.
Strike on Lothal[]
Using the information stolen by Chopper, Ezra, and Kanan, Hera is able to plan a strike on the Lothal Imperial Factory and plans to deploy a fraction of Phoenix Squadron and assigns Ezra to carry out reconnaissance work on Imperial military positions. When Sabine asks if Thrawn is there, Hera replies that there has been an increase in Imperial ships above Lothal but that they do not know for sure. Hera is forced to relieve Ezra of his duties after he experiences a Force vision of Maul and attacks a Rebel Crewman. While Ezra, Kanan, and Sabine stay behind to deal with Maul, Hera proceeds with the mission.
Continuing the Hunt[]
Later, Thrawn embarks on a campaign to scour the Outer Rim for Chopper Base. Under his command, Imperial Infiltrator Droids are dispatched to Outer Rim worlds to search for the bases. One of these droids, EXD-9, stumbles upon Chopper Base and is adopted by Garazeb Orrelios and AP-5, who mistake him for a Protocol Droid. Kallus, as Fulcrum, manages to warn Zeb who disables and reprograms the droid with the help of AP-5 and Chopper. The rebels then send EXD-9 back to the Empire as an improvised bomb which destroys an entire Star Destroyer.

Thrawn and Kallus discussing the loss of the EXD droids.
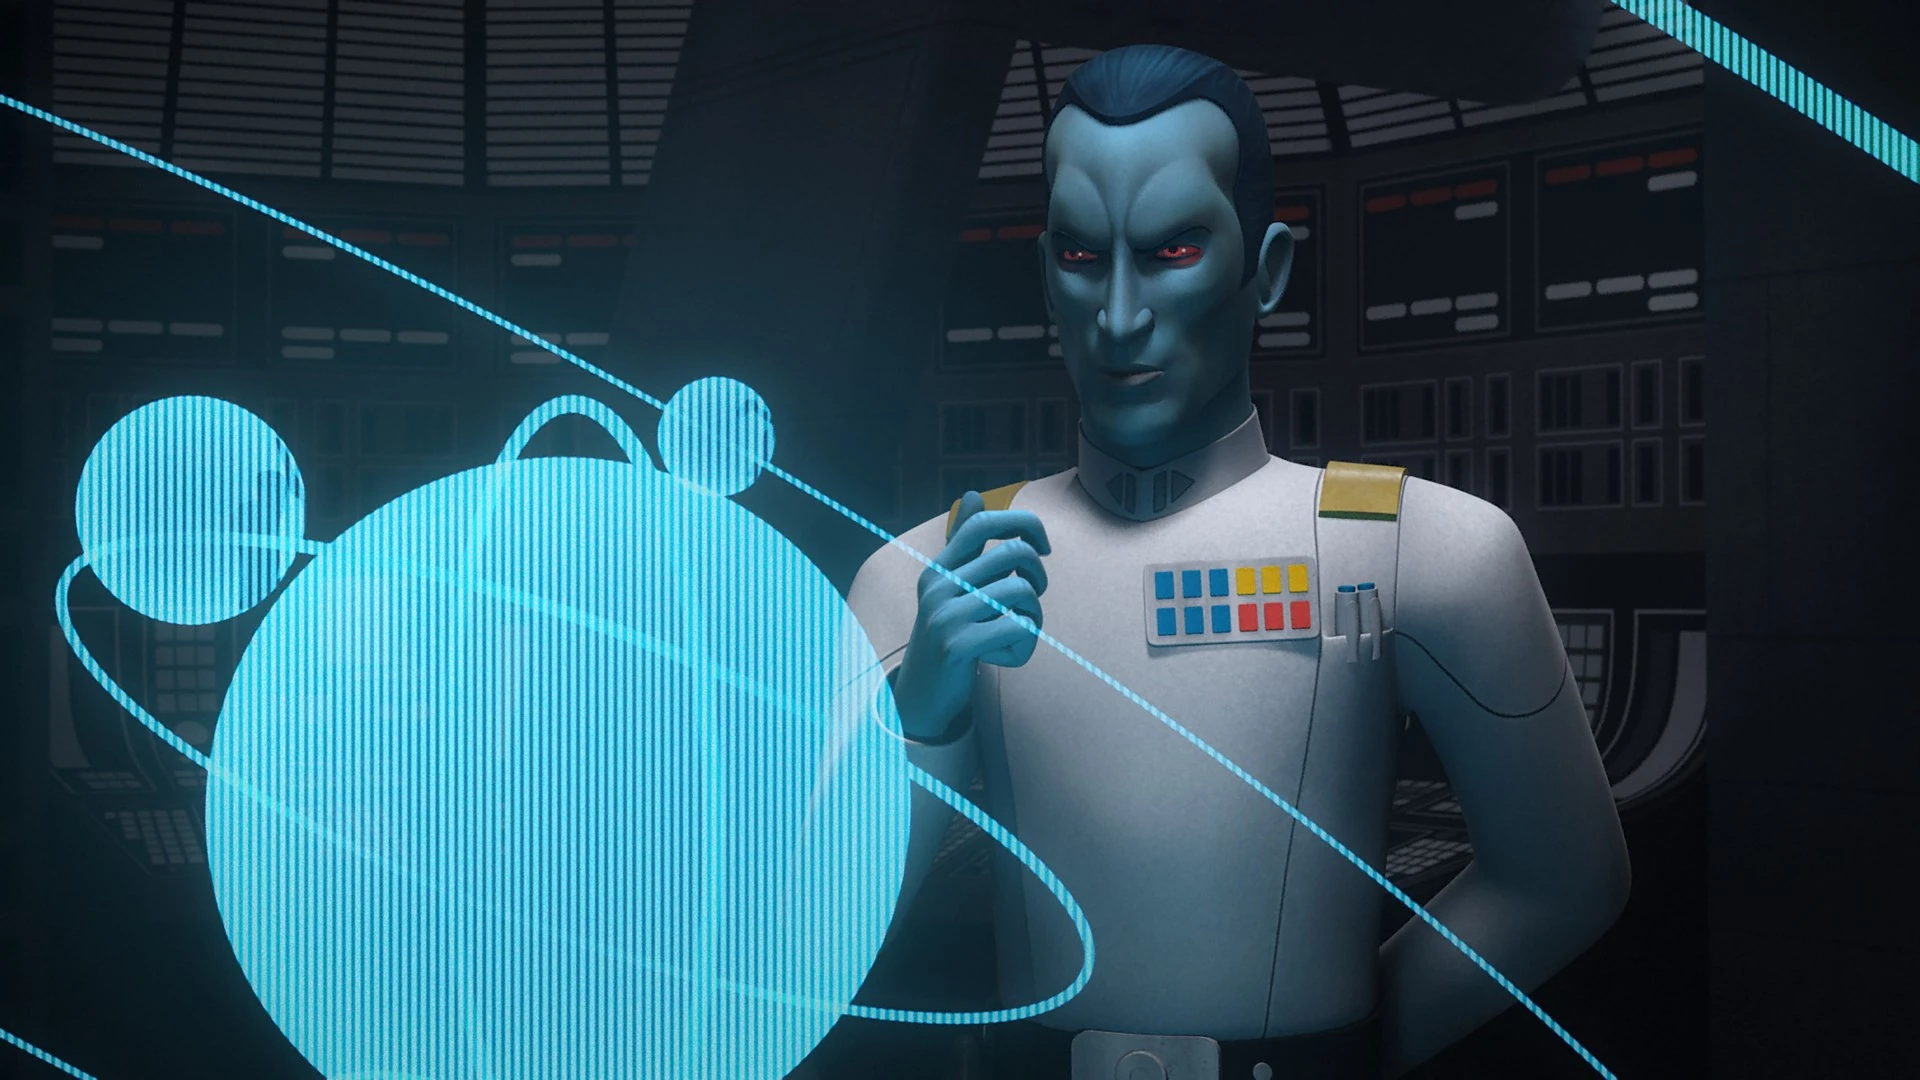
Following the destruction of the Star Destroyer, Thrawn meets with Kallus aboard the Chimaera where Thrawn asks how the explosion happened, Kallus responds that he believes that the rebels reprogrammed one of the Infiltrator Droids and programmed it to self-destruct back at its base. Despite the setback, Thrawn remains in good spirits because he managed to narrow down the search for the rebel base to 94 planets.
Discovering Fulcrum[]

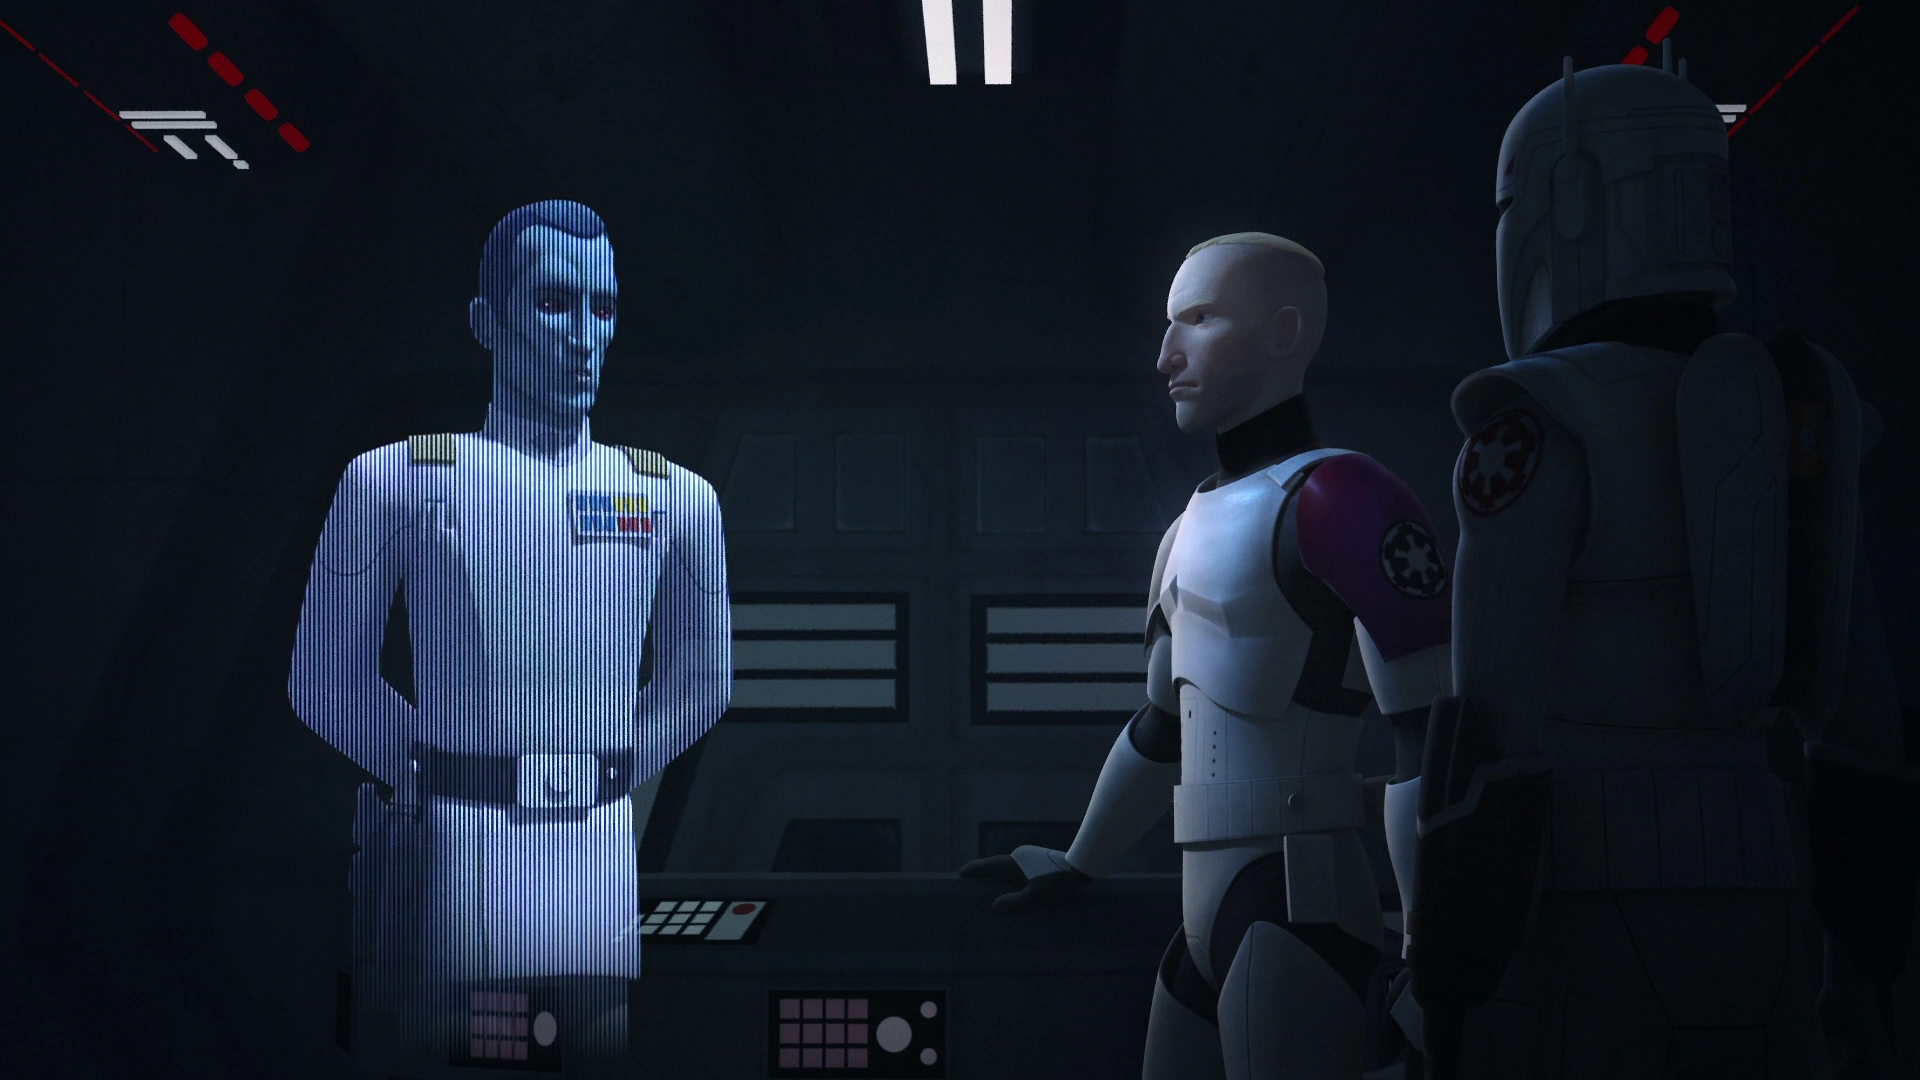
Thrawn informing his fellow Imperials about his progress in locating the rebel base.
Following a meeting with sector command staff, Thrawn requests Lyste, accompanied by Kallus, to meet with him aboard the Chimaera. Once they arrived, they made their way to Thrawn's Office where Thrawn himself, is practicing hand-to-hand combat with a pair of Imperial Sentry Droids. They are, instead, greeted by Konstantine where ISB Colonel Wullf Yularen awaits them inside who reveals himself to Kallus who instantly recognizes him from his days in the academy where Yularen was a mentor.
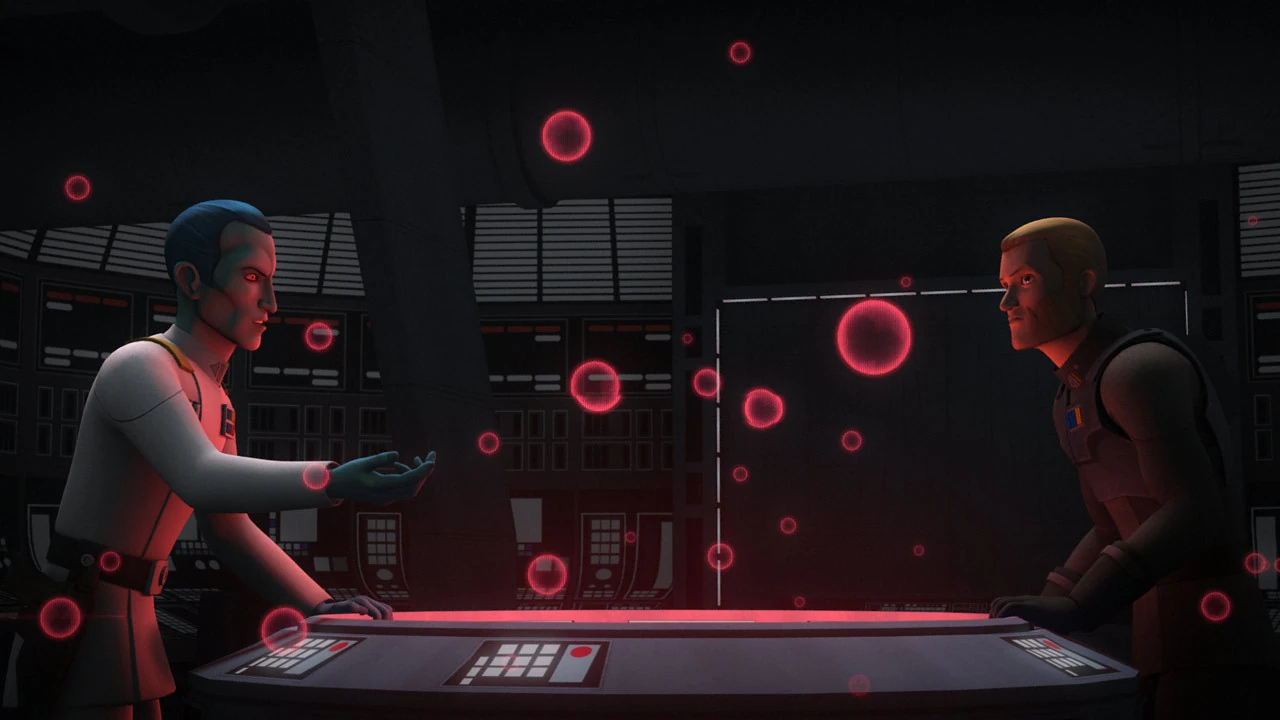
Thrawn soon follows to inform the group that Yularen's presence is needed to extradite a rebel spy among their ranks who are feeding the Rebellion information. Yularen cautions the group on information they reveal, even to their closest allies. Thrawn then reveals that he narrowed the search for the rebel's base through analyzing rebel hyperspace routes and the planet's proximity to Lothal anticipating an attack, once again. He dismisses the group to begin the investigation.
Pryce enters his office following the meeting to inquire for any progress. Thrawn states he set a trap by asserting that the rebel spy in question was present for the meeting and now they need to wait for the spy to pass on the information they learned. Yularen then informs Thrawn that a coded message was beamed off the Chimaera following the transfer of Ezra, disguised as a shuttle thief who intentionally got captured prior to Lyste meeting with Thrawn to rescue Kallus, to the ship. Thrawn decides to visit the mysterious prisoner to gain a better understanding of the transmission.
Before he can do so, Kallus releases Ezra from his cell using Lyste's Code Cylinder while also informing him that Thrawn is close to discovering the rebel's base and asks Ezra to tell him where it is located. Ezra refuses to reveal it until they arrive there but Kallus reassures Ezra that he will remove the planet from Thrawn's database to hinder its discovery. AP-5 states they can infiltrate Thrawn's office and erase the planet from the database while also gaining the clearance codes they require for Captain Rex and Kanan to retrieve them. Upon Thrawn's arrival to the detention center, his entourage becomes suspicious with the lax security and they discover the prisoner has escaped from his cell. Yularen reveals that Lyste's cylinder is the most recent code to access the cell, raising their suspicion of the Lieutenant.


Thrawn firing a blaster at his Imperial Sentry Droids.
The rebels manage to infiltrate the office and erase Atollon from his database bit, just before Thrawn returns, one of the guards informs Thrawn that Lyste is inside. With the guards at his side, Thrawn investigates his office for any tampering. Meanwhile, Kallus reactivates two of his Sentry Droids. Thrawn becomes satisfied that his office had not tampered with, however, the reactivated Sentry Droids barge in and begin attacking them, subduing his guards. Thrawn attempts to disable the droids with a clearance code but fails to do so. While Thrawn is fighting the droids, Ezra and Chopper who were previously in hiding in the office, make their escape, but, Thrawn discovers them and mistakes the disguised Ezra as Lyste. After a brief attack, he manages to defeat the droids and informs Yularen.

Thrawn deduces that Alexsandr Kallus is Fulcrum.
The rebels make their escape, however, with Lyste being the assumed rebel spy through misinterpretation of their escape, Kallus stays behind to continue his role once Thrawn is convinced the rebel spy threat has been neutralised with Lyste as the scapegoat. While analysing the events that unfolded, Yularen was not satisfied with how easy the conclusion was made. Thrawn agreed. They then analyses the helmet Ezra left behind with its depiction of a Loth-cat. Thrawn recognizes the art style to belong to Sabine Wren, thus revealing to Thrawn who the shuttle thief really was. Upon learning this, they inquire why Kallus didn't report Ezra when he was captured by Lyste. Thrawn concludes that Kallus has been the rebel spy, Fulcrum, all along and, in an act of deception, blames Lyste for the crime. Thrawn then plans to manipulate Kallus into revealing the location of the rebel base.
Hunt for Mon Mothma[]

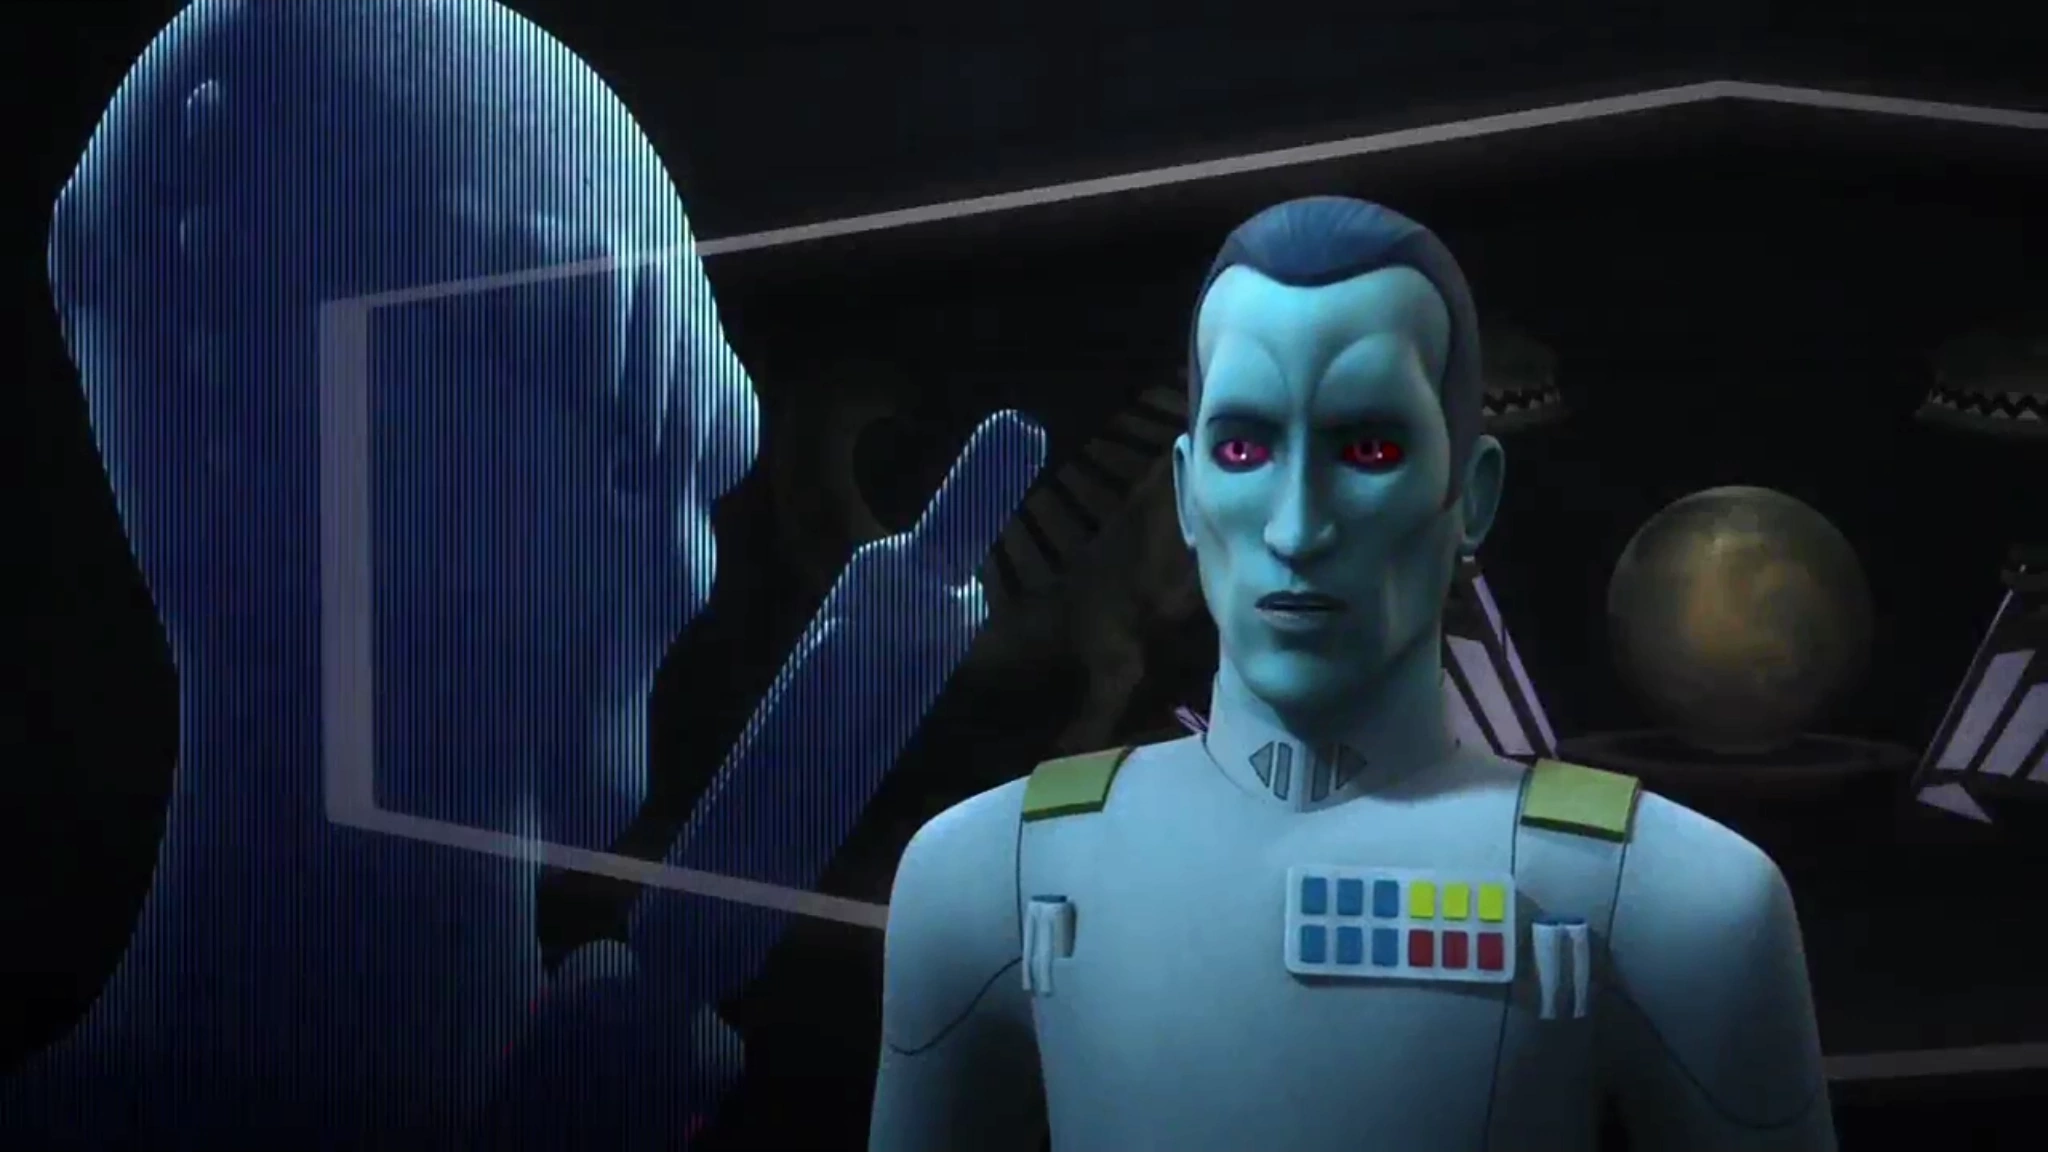
Thrawn explaining his plan to capture Mon Mothma.
After Senator Mon Mothma resignes from the Imperial Senate and gives a fiery speech denouncing the Ghorman Massacre placing the blame upon Palpatine, Thrawn receives intelligence that Mothma and the Ghost crew are planning to travel through the Archeon Nebula to avoid Imperial detection. Based on his knowledge of Hera, Thrawn anticipates that Hera would be risky enough to travel through the Archeon Pass. In response, he deploys his prototype TIE Defender piloted by Imperial ace, Commander Vult Skerris, and escorted by two TIE Interceptors to flush the rebels out of the nebula. Thrawn also tasks Pryce and Konstantine with positioning two Star Destroyers outside of the Archeon Nebula to capture them when Skerris drove them out. Despite Thrawn's planning, Hera and the rebels manage to escape with Mothma and her entourage following a brief skirmish in the Archeon Nebula.
Spy Droids[]
As part of his counter-insurgency efforts, Thrawn also utilises the services of a team of Imperial Information Office intelligence officers based aboard an Imperial Listener Ship. This team is led by Controller LT-319 and are tasked with gathering intelligence and monitoring rebel activities. As part of their intelligence operations, these spies are tasked with keeping an eye out for rebel droids such as Chopper, who had taken part in numerous undercover missions.
During the Ghost Crew's mission to Killun Station, LT-319's team detect Chopper's presence at the Imperial Security Bureau base. Using a network terminal, the team reprograms Chopper into a double agent droid and try to use him to discover the location of Chopper Base. As part of the operation, Chopper hijacks the Ghost and uses a Computer Spike to transfer data from the ship's navigation computer to the surveillance vessel. Before the download can be completed, the rebels retake control of their ship and remove the Imperial programming from Chopper. Hera then destroys the surveillance vessel by sending back their data feed, causing a data surge that blows the vessel apart.
Battle of Atollon[]
Thrawn arrives at the Imperial Complex flanked by his death trooper guards.
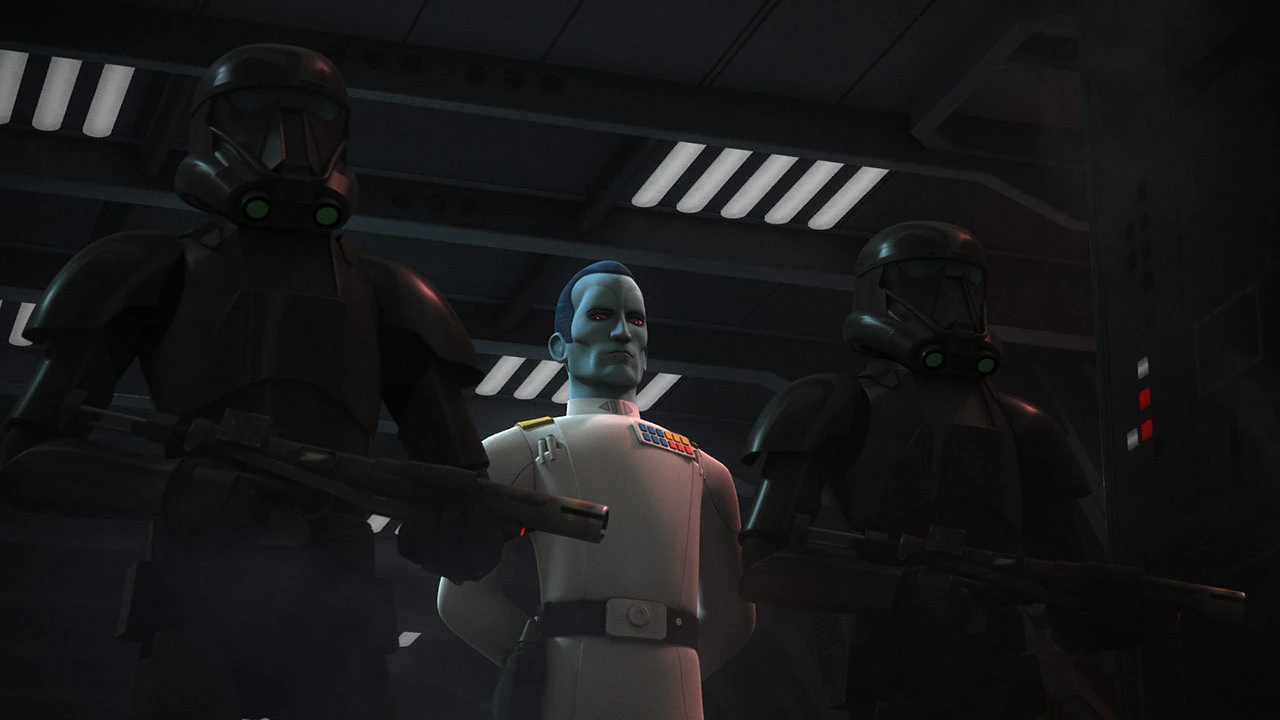
Later, Thrawn acquires the services of several elite Death Troopers and flies to the Imperial Complex in Lothal's Capital City for a private meeting with Pryce and Konstantine. Inside the briefing room, Thrawn closes the blinds and warns them that they still have a traitor in their midst. He also initiates a hologram conversation with Tarkin and warns that the Phoenix Squadron and General Jan Dodonna's Massassi Group are planning to attack the TIE Defender factories on Lothal. While Thrawn has not determined the location of the rebel base yet, he vows to capture the rebel leadership alive.
Kallus listens to Thrawn's conversation and travels to Ezra's Tower, which has a transmitter which he uses to send his Fulcrum transmission to the rebels. However, Thrawn has followed him there where, following a fist fight, Thrawn manages to defeat the rogue ISB agent. Kallus is taken captive by two Death Troopers and bring him back to the tower. Calculating the trajectory of both General Dodonna's fleet and Kallus' Fulcrum transmission, Thrawn is able to determine that the hidden rebel base is located in the uncharted Atollon System.

Thrawn speaks to the rebel leaders via hologram.
Thrawn orders Konstantine to blockade the Atollon System with his Seventh Fleet, cutting off any escape with two Interdictor Cruisers. He then travels to Atollon aboard the Chimaera with Pryce and the captive Kallus in tow where Thrawn issues a hologram transmission to Hera, Sato, and Dodonna; vowing to rain down defeat upon them. The rebel fleet tries to break the blockade but Thrawn's Star Destroyers and TIE fighters inflict heavy casualties. The rebels only manage to find a gap in Thrawn's blockade after Konstantine disobeys orders and gpes to intercept Sato's command ship, Phoenix Nest. Sato rams his ship into Konstantine's interdictor cruiser; destroying both vessels and allowing Ezra and Chopper to flee on the Gauntlet Fighter, the Nightbrother, into hyperspace.

Thrawn prepares to lead the ground assault against the rebels.
Despite this setback, Thrawn's forces have inflicted heavy casualties on the two rebel groups. After forcing the rebels back on the ground, Thrawn orders his fleet to bombard Chopper Base from orbit. However, the rebels have manage to activate Sabine's prototype deflector shield generator. To give the rebels the impression that their shields have stood up, Thrawn ceases the attack and delegates command of the Seventh Fleet to Pryce while he leads the ground assault on Chopper Base. Thrawn deploys both AT-DP and AT-AT walkers for the ground assault.
In order to learn the rebels' strength, Thrawn sends his AT-DP walkers into the canyon leading to Chopper Base first. The walkers are destroyed by Rex and Zeb's detonators and a rocket launcher but Thrawn then deploys several AT-AT walkers. These walkers destroy the remaining detonators, forcing the rebels to retreat which allows Thrawn and his Death Troopers to enter the base.
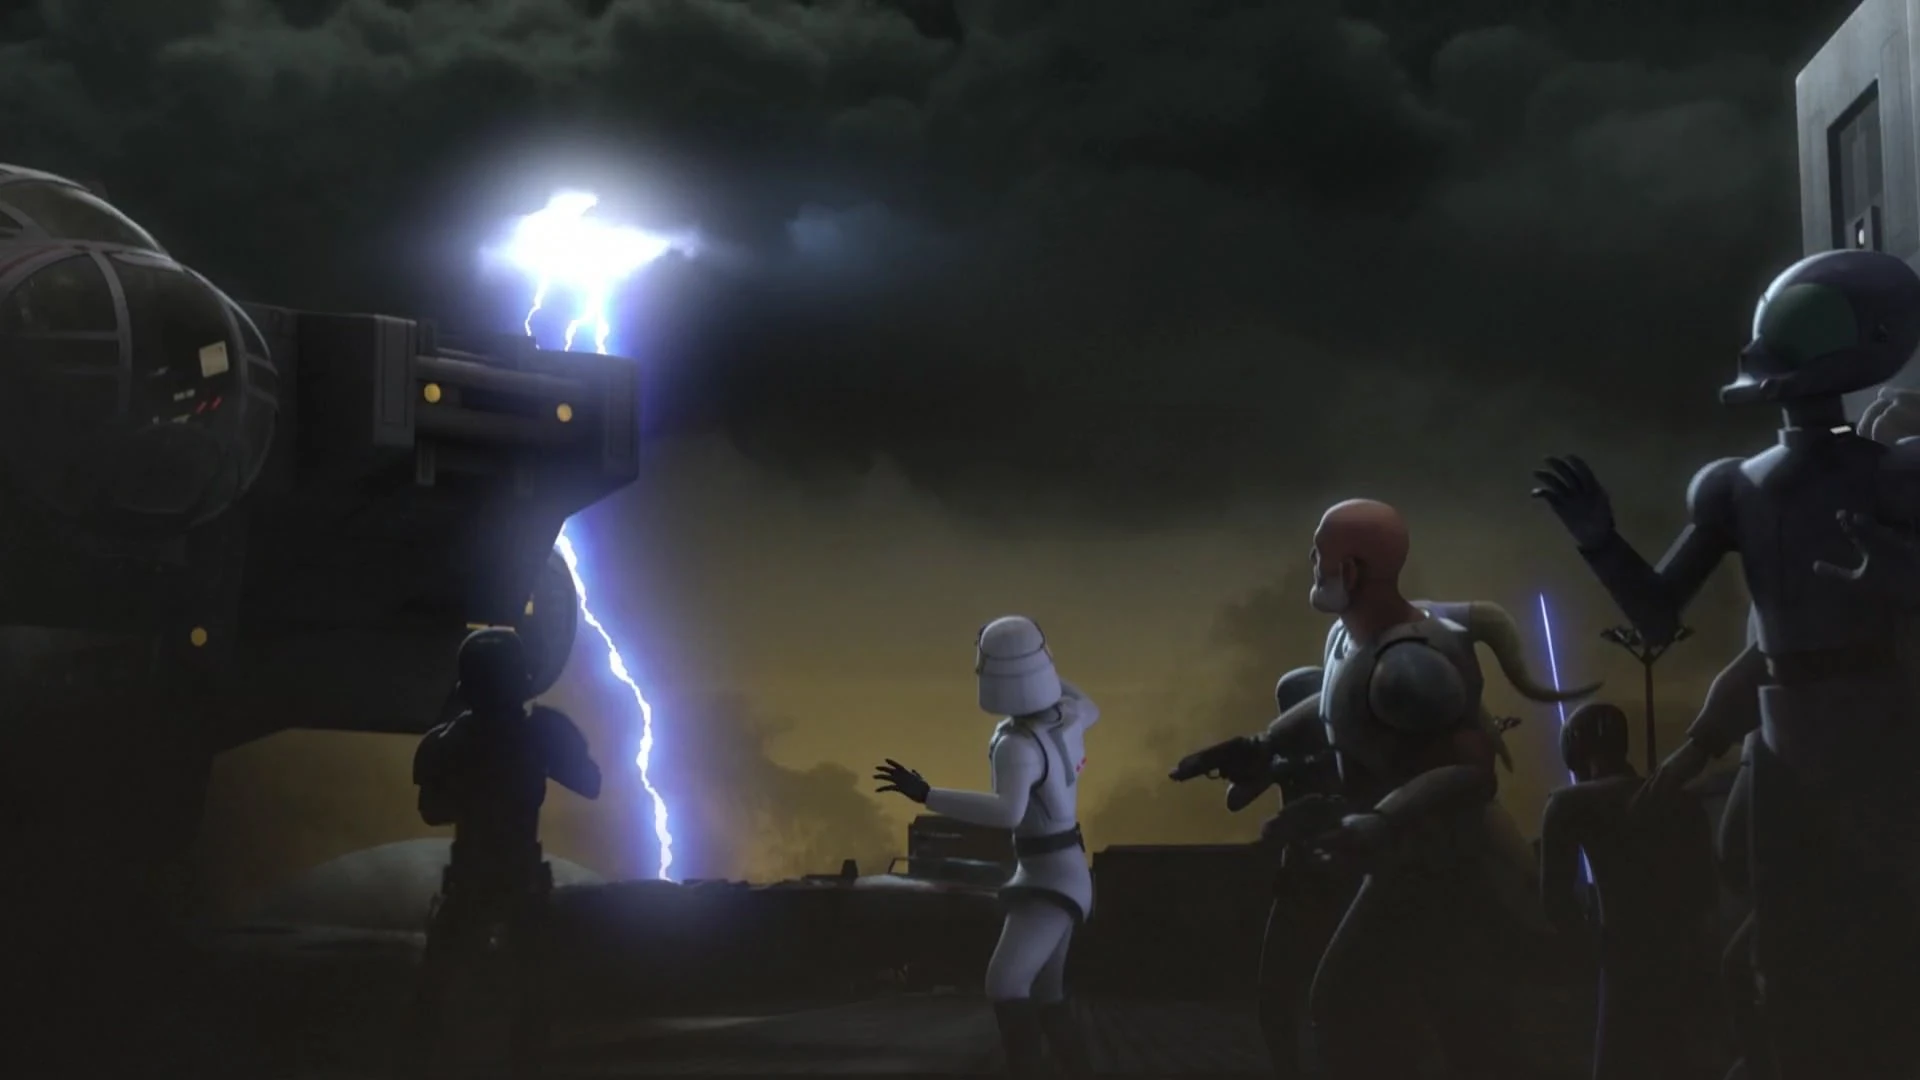

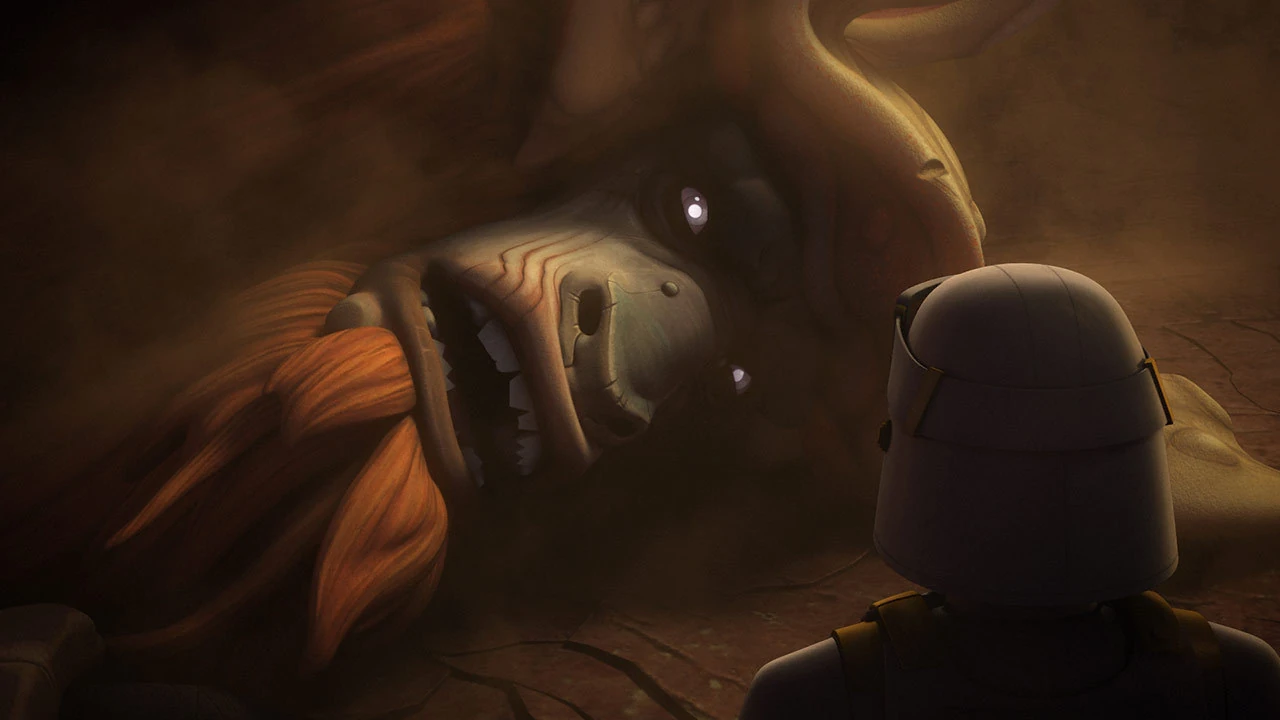
Thrawn cut off guard by the arrival of Bendu.
One of Thrawn's AT-AT walkers manage to destroy a GR-75 Medium Transport fleeing off-world. Thrawn and his troops then surround Hera, Dodonna and several rebels. When Hera refuses to surrender, Thrawn threatens to kill them beginning with Kanan. but Thrawn is interrupted by the mysterious Force-entity known as The Bendu, who embodiy the balance in the Force. Bendu uses lightning to destroy the base and strike down Thrawn's forces which gives the rebels the window needed to flee into space with their comrades Undaunted by the Bendu, the Grand Admiral orders his troops to concentrate fire on Bendu, which leads to him falling to the ground, effectively ending his rampage. Meanwhile, Ezra and Sabine's Mandalorian forces are able to destroy the second Interdictor Cruiser. This allows the tattered rebel remnants to flee into hyperspace but, despite failing to capture the rebel leadership and destroy the rebel forces completely, the Battle of Atollon ends as a victory for Thrawn.

Thrawn speaks to the fallen Bendu.
Following the battle, Thrawn confronts the fallen Bendu but, when Thrawn asks Bendu what manner of creature he is, Bendu replies that he was beyond Thrawn's power to kill. The creature also predicts Thrawn's defeat, describing it as "many arms surrounding you in a cold embrace." Undaunted, Thrawn shoots Bendu with his blaster but, while the creature disappears, he can still hear his laughter ringing.
Working with Darth Vader[]
Following his failure on Atollon, Thrawn speaks with the Emperor and Vader on Coruscant but Palpatine is displeased with how the rebels escaped. Thrawn is tasked with travelling with Vader to the planet Batuu to deal with a disturbance in the Force felt by Palpatine. During their trip, Thrawn takes multiple occasions to taunt Vader about him being the very same Anakin Skywalker he fought alongside on Batuu many years ago. After arriving above the planets surface aboard the Chimaera, Thrawn and Vader take a shuttle down to the surface. They enter a bar and encounter a species called the Darshi. Following the skirmish, Imperial forces become involved in a conflict with the warlike Grysk species.
Procuring Weapons[]
Civil War on Mandalore[]
Shortly before Thrawn's victory against the rebels on Atollon, an uprising led by Clan Wren of Krownest against the Imperial-backed government of Mandalore has begun as a result of Sabine to return to her home-world. This event sees the death of Governor Gar Saxon and all-out conflict emerges on Mandalore. Acting on the Emperor's behalf, Thrawn contacts Saxon's brother and successor as Governor, Tiber Saxon, instructing him to end the uprising as swiftly as possible. Saxon assures Thrawn that he will succeed in ending the conflict and promised that he would unveil a new weapon prototype that would prove invaluable to the Empire.

Thrawn speaks to Tiber Saxon.
A short time after the weapon had been tested for the first time during a battle with Clan Wren, Saxon shows Thrawn, present via hologram, the efficiency of the Arc Pulse Generator, also known as "The Duchess". Thrawn is shown the successful test of the Duchess against Clan Wren's warriors but, despite being impressed by the Duchess's abilities to target the Beskar metal in Mandalorian Armor, Thrawn expectesthe range to be greater. Though Tiber tries to defend that he had managed to rebuild the weapon from what fragment remained, Thrawn bluntly states that Tiber can't use the Duchess to its fullest potential because he does not truly understand it. Thrawn then suggested to Tiber that he should capture the Duchess's creator, Sabine.
Upgrading the TIE Defender[]
Sometime later, Thrawn and Pryce, with an accompaniment of Death Troopers, visit an Imperial base on the plains of Lothal to see how his new prototype is faring. Upon arriving, he is greeted by Skerris, who promises to show him the fighter's capabilities. During the visit, a TIE Pilot catch Ezra off guard, causing him to be spotted by Thrawn and Pryce. Thrawn is surprised to see the rebels here and orders his Death Troopers to secure the prototype, before watching the young Jedi's antics with vague curiosity and responding to Ezra's casual greeting with a dry remark, sounding not surprised.
Thrawn preparing to shoot the TIE Defender Elite.
Ezra is merely distracting the Imperials for Sabine, as she is inside the Defender Elite attempting to steal its Flight Data Recorder. Seeing Ezra pinned down, she lifts off in the fighter and helps him inside before destroying most of the depot's parked fighters and even strafing the area where Thrawn is standing. Unfazed by the powerful bolts scorching the ground inches from him, Thrawn calmly stands his ground and fired up at the rogue fighter with his blaster even as his fellows scurry for cover until it goes screaming over his head. The fighter then proceeds to blow up the shuttle Thrawn arrived in and strafes the command tower before screeching off into the grasslands. Still calm, Thrawn drily inquires if the debacle had been part of the aforementioned demonstration and Pryce offers to activate the Defender Elite's kill switch, but Thrawn instead sees a perfect opportunity to test the ship's combat abilities and orders Skerris to deploy three TIE Interceptors in pursuit.
After two of the Interceptors were destroyed in short order, Skerris surmises that Hera is piloting the Defender Elite. Thrawn states that it is unlikely, as he is aware of her piloting skills and that all three interceptors will have been destroyed by then if she is the pilot. When the Defender Elite's transponder is disabled, he notes that it has been done in record time and guesses that Sabine was also on the Defender Elite with Ezra. He then comments on the strength of the Defender Elite, as a novice pilot like Ezra was easily able to destroy the three TIE Interceptors. Thrawn then allows Pryce to activate the kill switch and promises her ground reinforcements in their attempt to find Ezra and Sabine, but they fail to find them, as a Loth-Wolf had already taken them to safety.

Thrawn angered that Hera Syndulla escaped.
Having secured the crash site, Pryce contacts Thrawn and informs him that both the flight data recorder and hyperdrive are missing from the wreckage. This leads Thrawn to deduce that they will try to get the data to Rebel Command, so he dispatches his own personal agent, Rukh, to stop them. When Pryce protests that such help is not necessary, Thrawn points out that the rebels' presence on Lothal and the theft of the Elite are testaments to the contrary. Despite Rukh's efforts, the rebels nonetheless escape his grasp. Attaching the stolen hyperdrive to an ageing U-Wing Starfighter, Hera escapes Thrawn's massive blockade by jumping to lightspeed through the hangar of an Imperial Construction Module. Thrawn is visibly annoyed when informed of this.
Attack on Lothal[]
Thrawn is later holding command on his flagship when he was informed of several rebel starfighters entering the system and realises that the long-awaited attack on Lothal is now commencing. Reasoning that the rebels will most likely target the TIE Defender factory and Lothal Fuel Depot in Capital City, Thrawn contacts Pryce and orders her to shore up ground defences but, when the rebels already on Lothal manage to destroy the anti-air batteries on the ground, Thrawn orders Skerris to join the fray and prevent any rebels from reaching the surface. Skerris, piloting a new TIE Defender Elite, destroys two rebels in quick succession but is unable to resist pursuing Hera (newly promoted to General) after she revealed herself. Unable to match the Elite's speed, Hera instead heads straight for the Chimaera.

Thrawn commands Rukh to capture Hera Syndulla.
Realizing she is attempting to lead Skerris into a trap, Thrawn orders him to cease his pursuit but is refused. Thrawn nonetheless orders his gunners to open fire and the blasts strike both Skerris' Defender Elite and Hera's X-Wing Starfighter, disabling their shields. Hera then damages the Chimaera's targeting array, briefly hides in the smoke produced by the subsequent explosion, and fires on Skerris' now vulnerable fighter, damaging its wing assembly and sending it spinning into a light cruiser. The crippled light cruiser in turn then crashes into a Star Destroyer and shears through its bridge tower, allowing the strike force to make a break for the planet surface.
Before they are able to reach their targets, Thrawn orders the second wave of TIE fighters to intercept them, and they manage to destroy the entire strike force. Upon being informed that by Woldar that several X-Wings have crashed in and around the Capital City, Thrawn contacts Rukh on the ground and orders him to locate and capture any survivors; particularly Hera. After a lengthy chase through the streets of Capital City, Rukh catches up with Hera and successfully captures her after a short fight.
Threat to the Defender Project[]
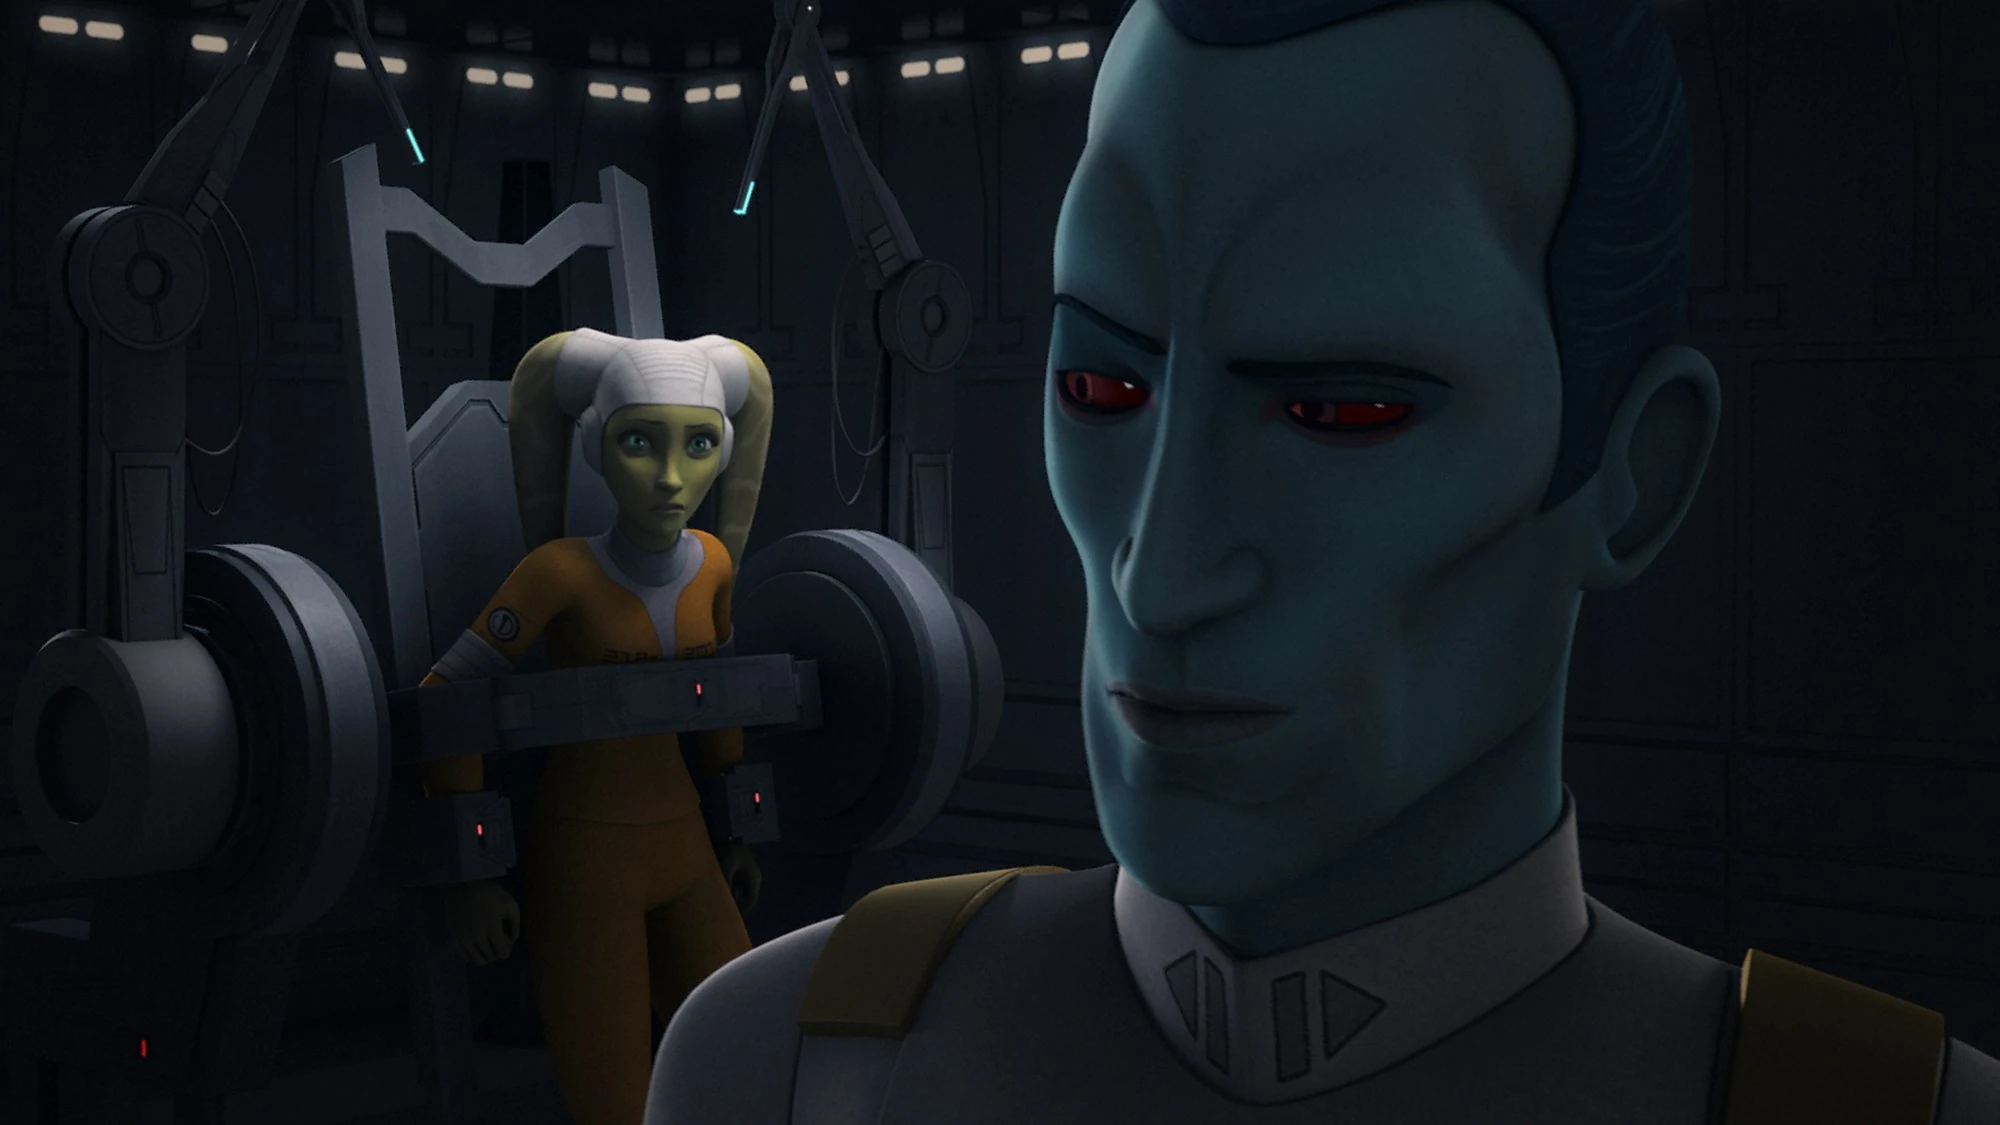

Thrawn interrogates Hera Syndulla in Pryce's Office.
While Governor Pryce is torturing Hera Syndulla, Grand Admiral Thrawn enters Pryce's office and asks if Hera has revealed the location of the rebel fleet. Pryce responds that she has not begun interrogating Hera so Thrawn questions Hera but the rebel leader remains defiant. Thrawn then shows Hera her Kalikori and talks about the shapes on the Twi'lek artefact. When Thrawn questions Hera about her lost brother, Hera responded that he was unworthy of holding it. Believing that the Kalikori would end with her, Thrawn promised that the Kalikori will be in good hands before leaving.
Due to Hera's failed attack against the Lothal factory and the theft of the Defender Elite, Grand Moff Tarkin informs Thrawn that Orson Krennic, the Director of Advanced Weapons Research, persuaded the Imperial authorities to divert further funding to his "Project Stardust" - the first Death Star battle station, which had been under development and construction for nearly two decades. Thrawn protests that the Emperor already assured him that he supports the TIE Defender program, to which Tarkin replies that he had arranged an audience with the Emperor for Thrawn to plead his case. Thrawn immediately departs Lothal aboard the Chimaera to return to Coruscant.

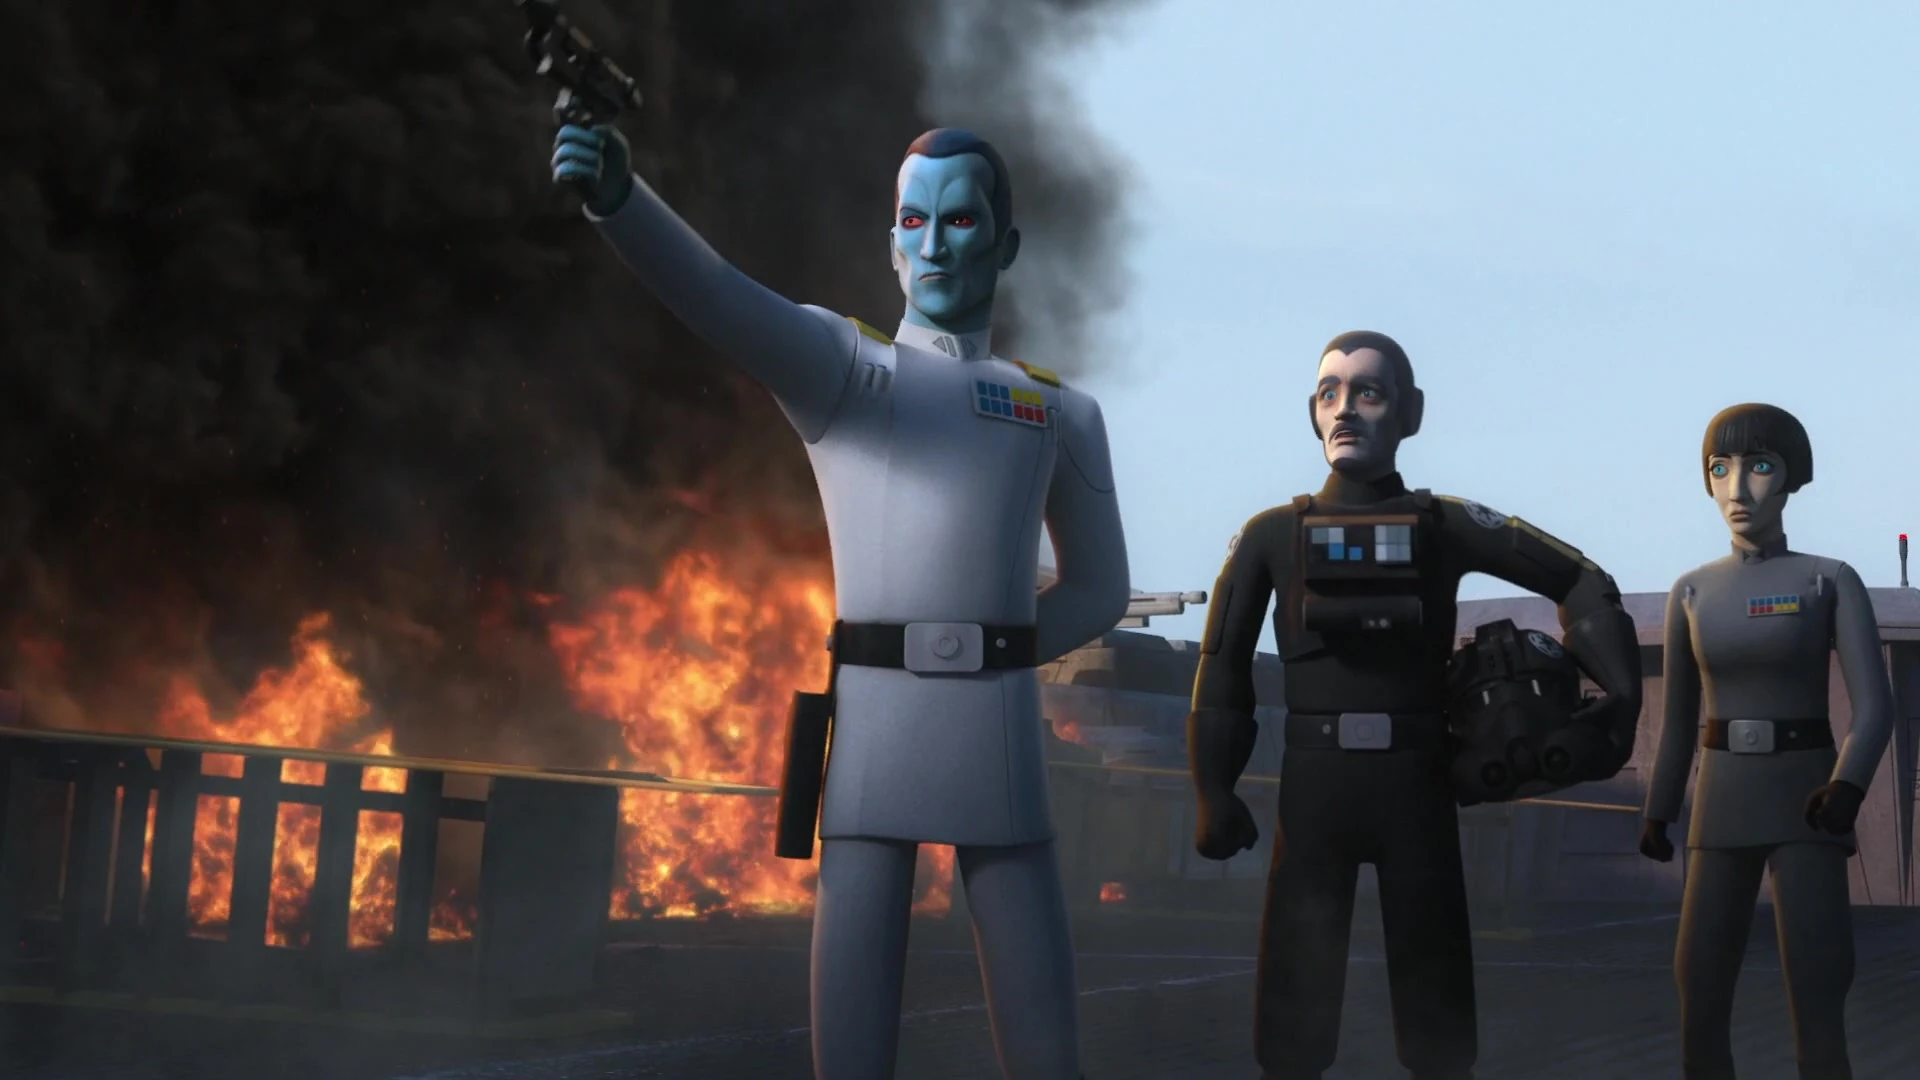
Thrawn lashes out at Arihnda Pryce for destroying the Lothal Fuel Depot and seizing his TIE Defender program.
While on Coruscant, Thrawn learns that Governor Pryce has destroyed the fuel depot outside of Lothal's capital in an attempt to prevent the rescue of Hera Syndulla. Though the resulting explosion killed the rebels' leader Kanan Jarrus, it also crippled the Imperials by destroying all of their fuel on the planet, bringing the Defender program screeching to an indefinite halt. Thrawn chastises the governor for having the audacity of holding a parade to hide the magnitude of the disaster. Cutting off her protests, the Grand Admiral coldly informs Pryce that he will deal with her upon his return to Lothal, but in the meantime, he feels that without Kanan's leadership, the rebels - particularly Ezra Bridger - will be aimless, and attack recklessly. To that end, he dispatches Rukh to eliminate them once they show themselves.
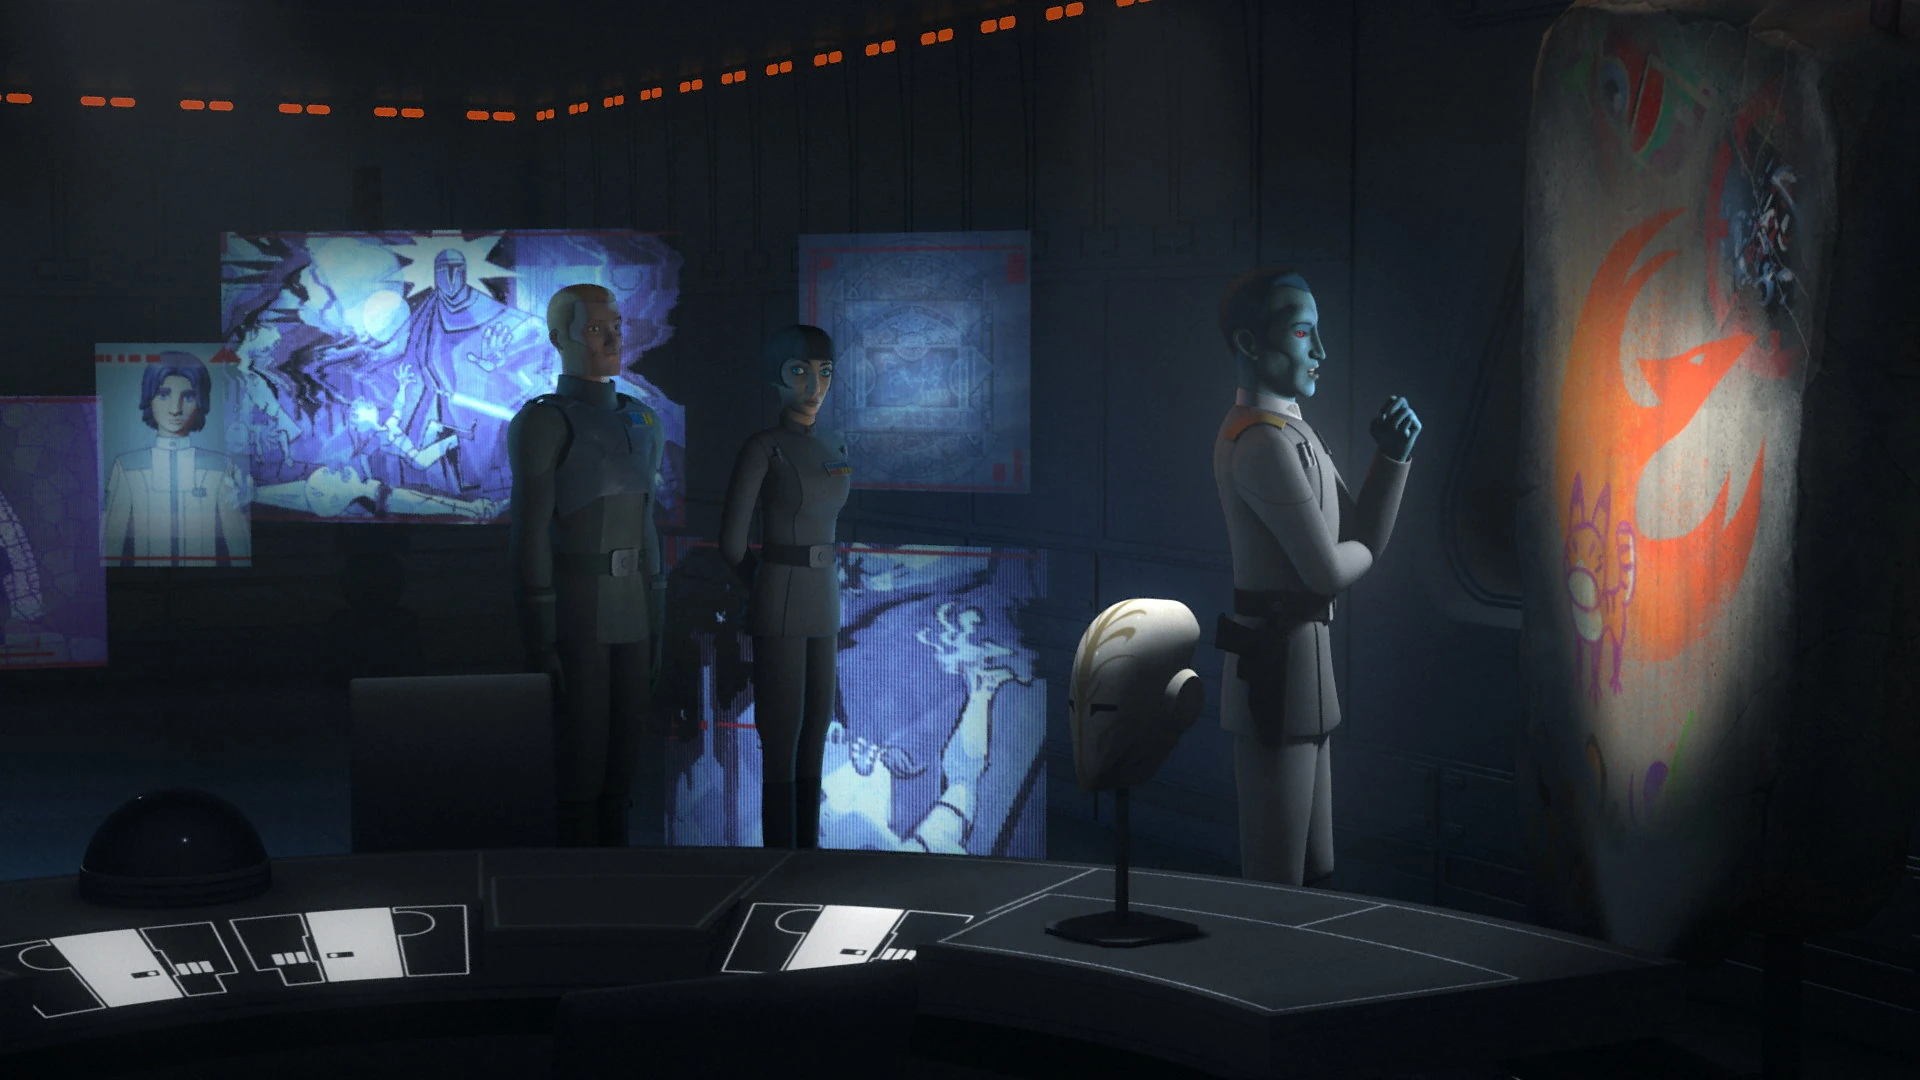
Fooling scout troopers[]
Sometime later, the Spectres attempt to infiltrate the Lothal Jedi Temple which is now under the Empire's control. To that end, Chopper displays a hologram recording of Thrawn during the Battle of Atollon to distract two scout troopers long enough for Orrelios to knock them out and give their armor to Bridger and Wren. After Wren is exposed and captured by Veris Hydan, Hydan informs the Mandalorian that Thrawn admires her work and has amassed a collection of her artwork.
Liberation of Lothal[]

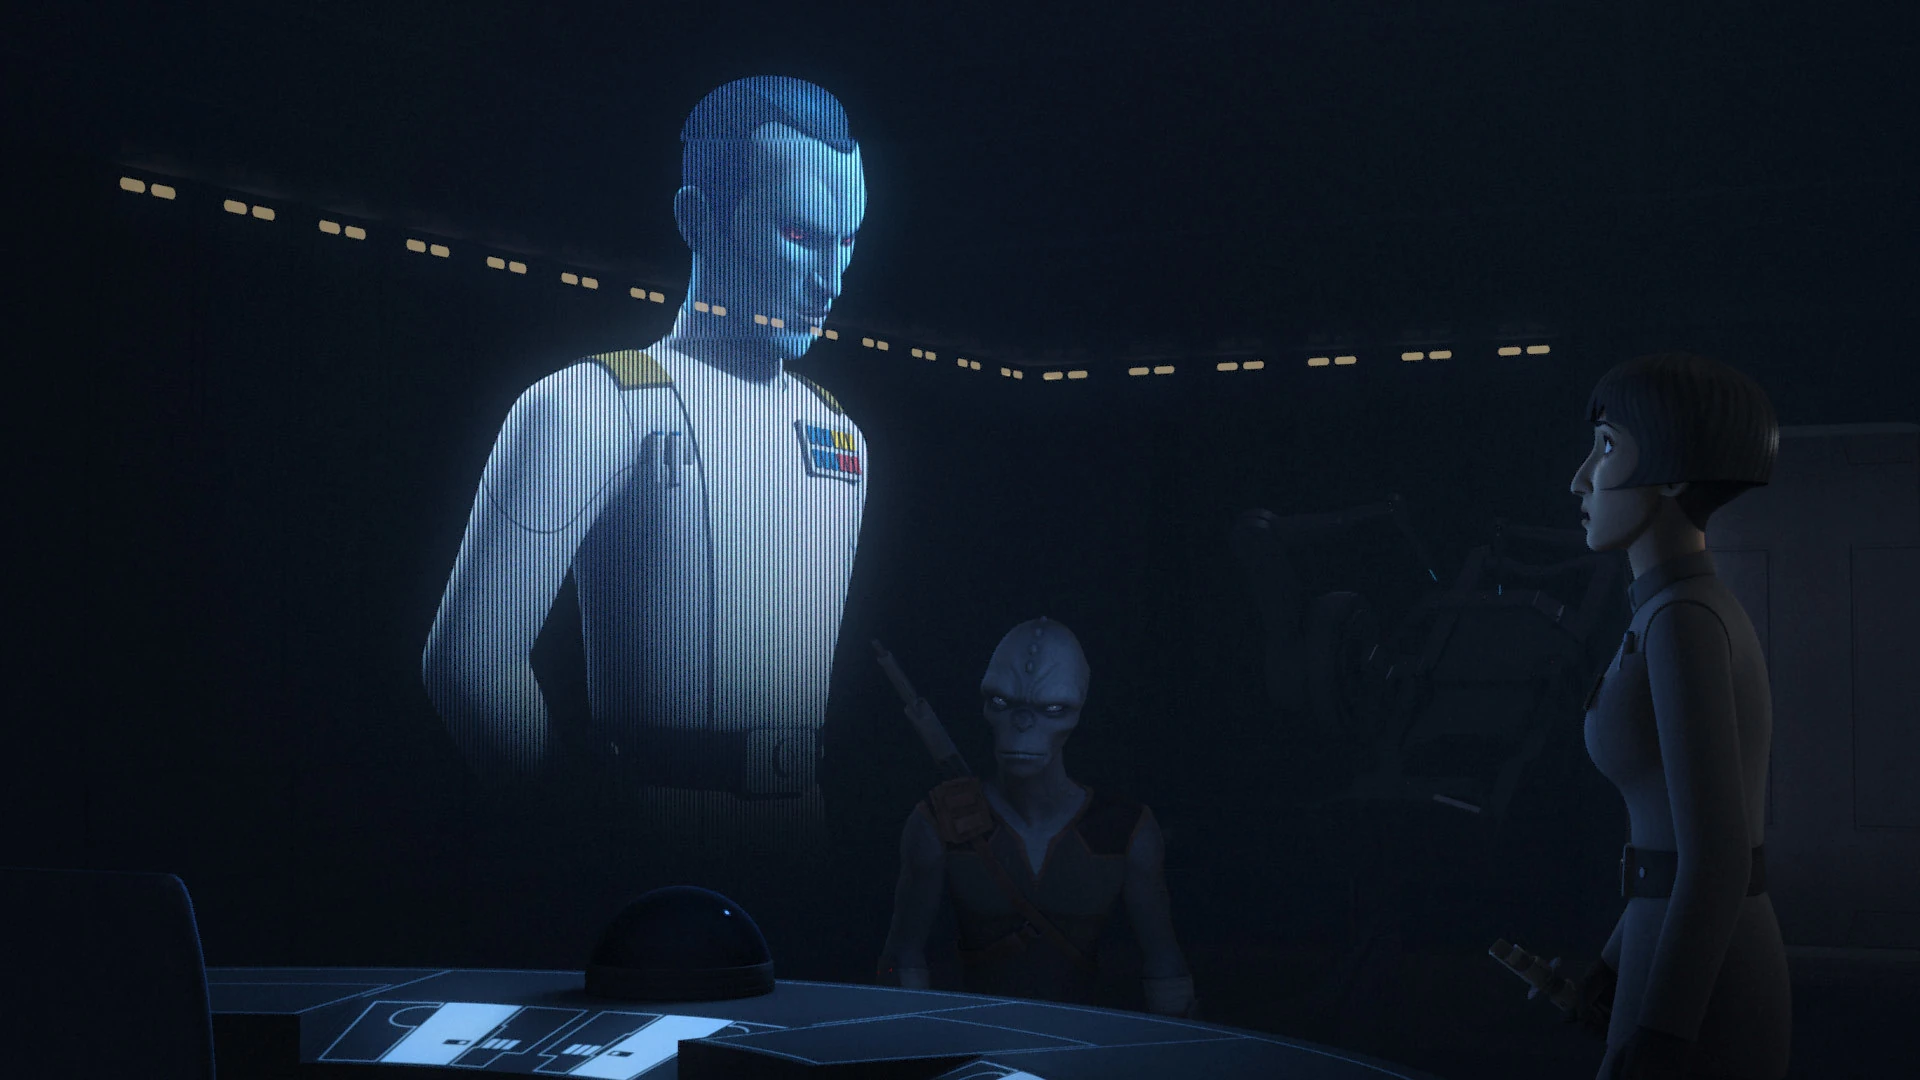
Thrawn and Ezra Bridger discuss the Galactic Empire's status on Lothal.
Thrawn returns from Coruscant to find that Ezra and his forces have captured Governor Pryce and taken control of Imperial headquarters in the capital, falsely enacting Protocol 13 to lure the planet's garrison into the dome in order to remove them from the planet. The Chimaera positions itself directly above the dome so that the dome crashing into it will destroy Lothal City, and Thrawn calls Bridger's bluff by having Rukh disable the planetary shield before opening fire on the city itself.
Seeking to prevent his people from being slaughtered, Ezra surrenders himself to Thrawn aboard the Chimaera, where Thrawn takes him to his office and shows him the displays of art he had collected from Lothal, explaining the intent to preserve them before the destruction of the planet, a course of action he now deemed inevitable, but one he admitted was never his intention. Thrawn then brings Ezra into a cargo hold which contains the remains of Lothal's Jedi Temple, and a hologram of Emperor Palpatine himself.
Leaving Ezra in the presence of his Emperor, Thrawn returns to the bridge and orders a full-scale bombardment. Ezra manages to escape from the cargo hold and storm the Chimaera 's bridge, just as the rebel forces on the ground are able to raise Lothal's planetary shield. Thrawn attempts to contact Rukh but Zeb answers instead, as Rukh is being electrocuted by the shield generator. As Ezra and Thrawn face off, multiple unknown contacts emerge from hyperspace and destroy Thrawn's blockade fleet in orbit: a flock of Purrgils, which had been summoned by the Ghost at Ezra's direction.
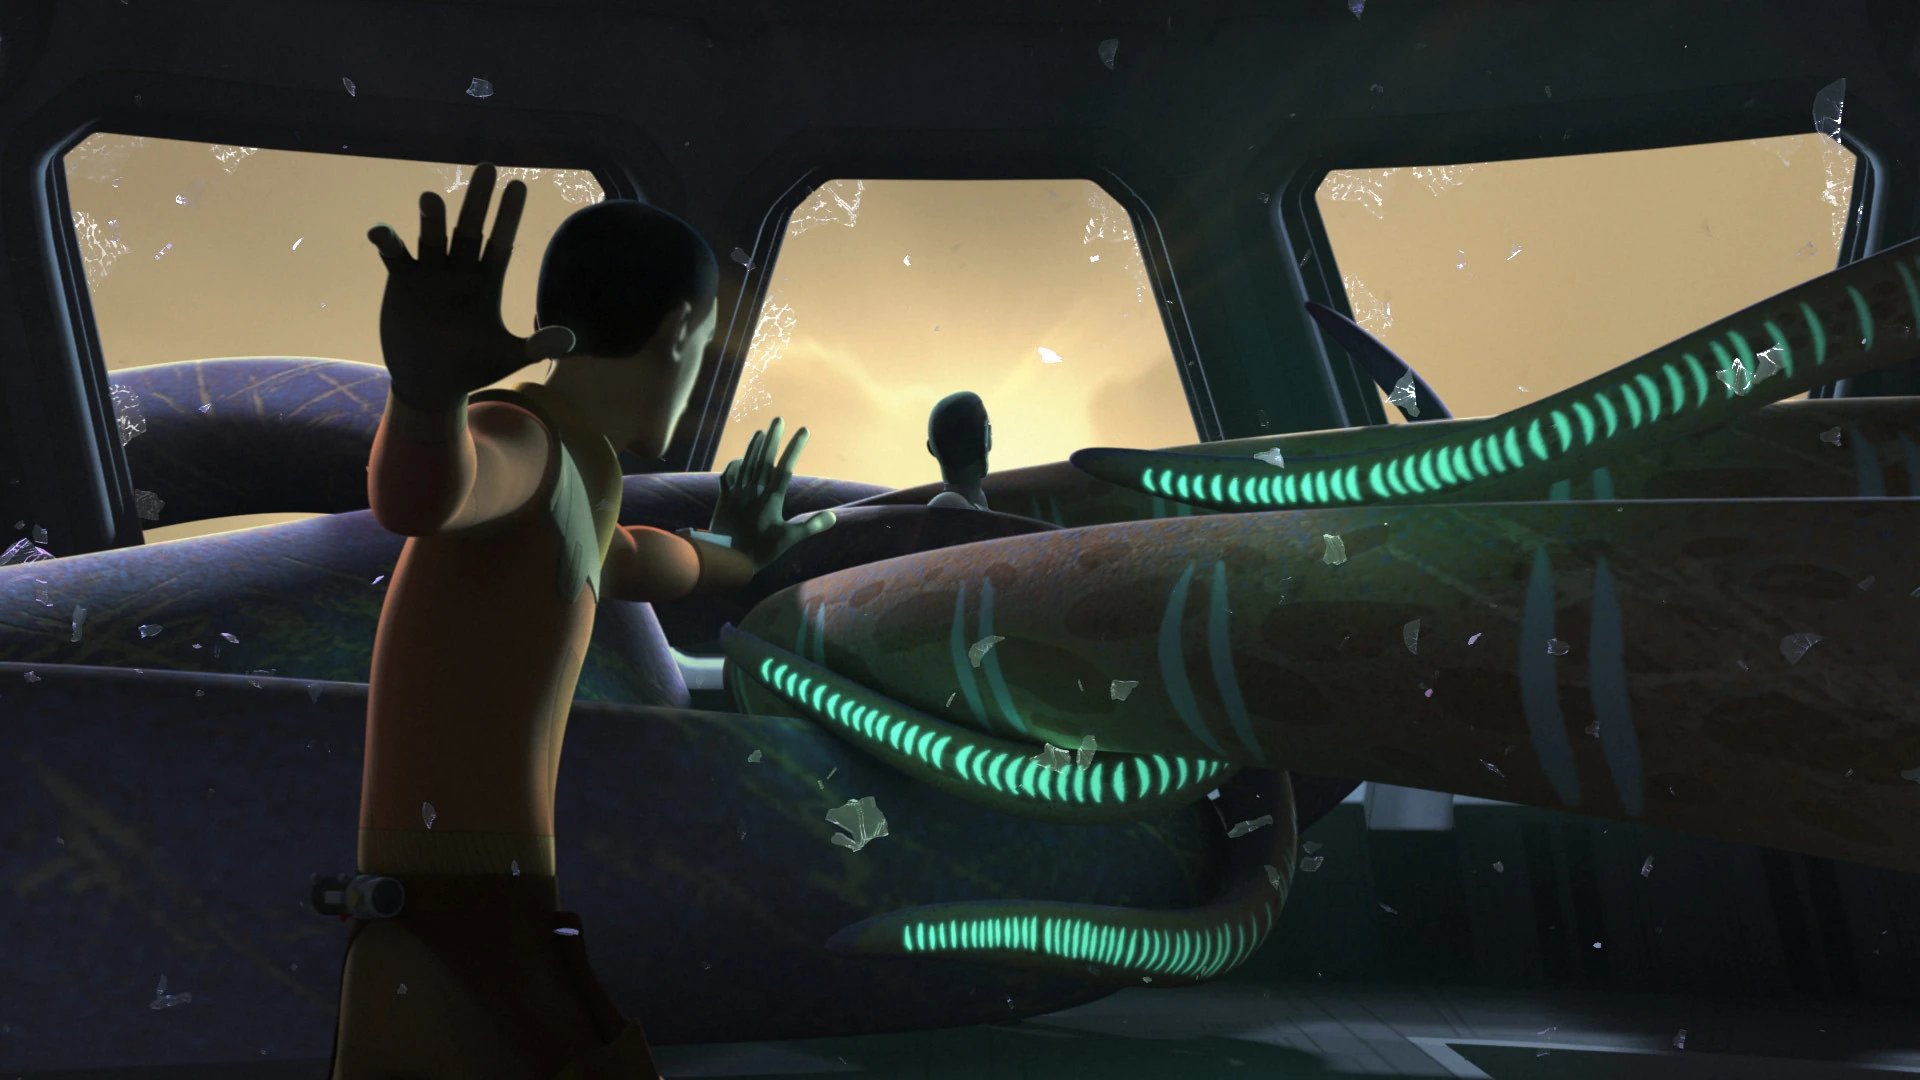

Thrawn and Ezra Bridger travel through hyperspace to locations unknown.
One Imperial officer reports that the ships attacked by the Purrgil are "just gone," and Captain Gilad Pellaeon reports that he has never seen anything like it before their communications are cut off. The Purrgils wrap their tentacles around the Chimaera, smashing their tentacles through the viewports and holding Thrawn and his crew in their grip. Though he wounds Ezra with his blaster, Thrawn is Force-pushed into the Purrgils' tentacles by the young Jedi, the "many arms" of the creatures holding him in their "cold embrace", just as the Bendu had foretold. The creatures carry the Chimaera— Thrawn and Ezra — into hyperspace, though both survive.
In the Unknown Regions[]
Cast out of the known galaxy, Thrawn and his remaining forces apparently take Ezra prisoner. After Palpatine’s death, he begins reorganizing the scattered Imperial remnants in an effort to retake control of the galaxy for himself.
Eventually, Thrawn sends his subordinate Morgan Elsbeth to take over the city of Calodan on the forest planet of Corvus. Learning that Elsbeth knew where Thrawn is, Ahsoka Tano travels to the city and Thrawn wants Ahsoka dead, so he orders Elsbeth to send her troops to kill her, but they are unable to do so. With the help of Din Djarin, she is able to defeat Elsbeth and her forces, and demands to know where Thrawn is hiding. Thrawn is later absent from a meeting of his fellow Imperial warlords, with Captain Pellaeon, Moff Gideon and Brendol Hux all discussing his plans to return to the known galaxy.
Legacy[]
Following the deaths of Palpatine and Vader, an Imperial Observatory on Jakku used Thrawn's data to help chart a course through the Unknown Regions. The data Thrawn accumulated allowed many Imperials to escape to that previously unexplored part of the galaxy after the Galactic Concordance was signed, putting an end to the Galactic Civil War. In the years that followed, these Imperials were able to reorganize into the First Order, which means that Thrawn was indirectly responsible for allowing the Empire to survive and reorganize itself.